Engineer the perfect light spectrum for optimal plant growth. Boost your yields and cultivate year-round with our energy-efficient LED solutions. Tell us your needs for a customized lighting strategy and quote.
Growing premium cannabis indoors is mostly a planning problem: how much canopy you need to cover, how evenly you can cover it, and how much power (and HVAC) you’ll need to hold that coverage through the full cycle. When people struggle with yield consistency, “hot spots,” foxtailing, or disappointing grams-per-watt, the root cause is often a lighting plan built on watt guesses instead of canopy math.
This guide walks you through a simple, repeatable way to plan led grow lights for cannabis using the metrics that actually matter (PPFD, PPF, DLI, and efficacy), plus practical layout and electrical tips so your room runs efficiently and predictably.
Table of Contents
Know the lighting metrics that actually control yield
PAR, PPFD, and PPF in plain English
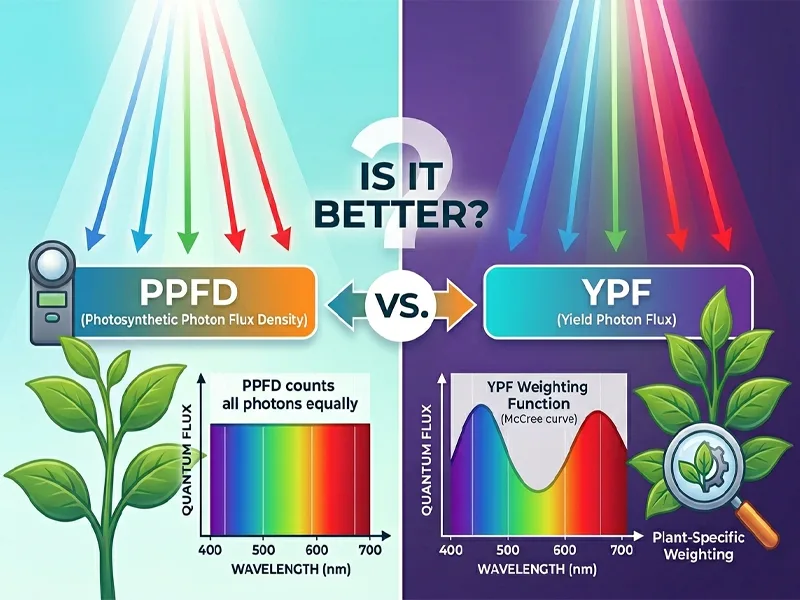
For modern indoor grows, we care about how many photosynthetic photons reach the canopy, not how “bright” a light looks to human eyes. PPFD tells you the photon density hitting your canopy each second (µmol/m²/s), while PPF tells you the total photons the fixture emits each second (µmol/s). A quick overview of how PAR/PPF/PPFD fit together can be found in many horticultural lighting references, and the key takeaway is: PPFD is what plants feel at the canopy. UPRtek
DLI connects intensity and time
DLI (Daily Light Integral) is the total photosynthetic light delivered over the whole day (mol/m²/day). It’s effectively “PPFD × hours,” and it’s one of the clearest ways to compare different lighting schedules. If you want a straightforward explanation of DLI and how it’s calculated from PPFD, Virginia Tech Extension has a very clear breakdown, and Apogee Instruments also explains DLI as an integrated daily total. Virginia Tech Publications
Efficacy (µmol/J) is the bridge between light and power
When planning power needs, the most useful spec is photosynthetic photon efficacy (PPE) in µmol/J (micromoles per joule). This tells you how many usable photons you get per unit of electrical energy. Programs like the DesignLights Consortium (DLC) publish technical requirements and reporting conventions that reinforce why µmol/J is the best “efficiency language” for horticultural fixtures. DesignLights
Set target light levels for each cannabis stage
Propagation and early veg targets
Cuttings and young plants don’t need extreme intensity, and too much light early can cause stress, slow rooting, or overly tight growth that’s hard to manage later. Many growers start clones and small veg plants at a lower PPFD and ramp up as the canopy develops, using dimming or height changes to control intensity. The goal in this stage is uniform, gentle photons rather than peak numbers.
Flower targets and what research says about “high light”
Cannabis is widely considered a high-light crop, and research supports that yield often continues to respond positively as you push canopy PPFD higher—at least up to ~1000–1500 µmol/m²/s in controlled environments, depending on cultivar and conditions. For example, controlled-environment studies have examined photosynthesis and responses around ~1500 µmol/m²/s, and canopy-level yield/physiology work has explored relationships up to similar intensities. PMC
The practical takeaway is not “always blast 1500,” but rather: high PPFD can pay off only if the rest of the environment keeps up—CO₂, temperature, VPD, nutrition, and airflow. If those inputs lag behind, you’ll spend more electricity without converting photons into harvestable biomass.
Use DLI to keep decisions consistent
Because flowering photoperiods are usually shorter than veg photoperiods, you can use DLI to sanity-check your plan. A room running “moderate” PPFD for long hours can sometimes deliver the same DLI as a room running “high” PPFD for fewer hours, but the plant responses and operating constraints can differ. This is why DLI is a planning tool, not just a measurement: it keeps you from comparing apples (18-hour veg) to oranges (12-hour flower). Virginia Tech Publications
Plan coverage first: canopy geometry beats watt-per-square-foot
Step 1: Define the true canopy footprint
Coverage planning starts with one honest number: how many square meters (or square feet) of canopy are you really lighting. Walkways, equipment zones, and edge gaps don’t produce buds, but they still consume photons if your fixtures spill light into them. If you’re building a commercial room, even small footprint errors can mean you buy too many fixtures—or worse, too few to hit your target PPFD uniformly.
A simple rule: plan lighting for the canopy you intend to maintain at peak flower, not the room’s wall-to-wall dimensions. If you run a 10’×10′ room but only flower a 9’×9′ canopy due to walkway space and air movement, base your light math on 81 ft², not 100 ft².
Step 2: Decide the uniformity you want (and what you can afford)
Cannabis responds strongly to uneven light: tops in hot spots can bleach or foxtail, while edges lag behind and finish later. Professional lighting plans aim for strong uniformity, often discussing metrics like average PPFD and minimum-to-average ratios, but you don’t need fancy software to apply the concept.
What matters operationally is this: a “high average PPFD” with terrible uniformity often performs worse than a slightly lower average with excellent uniformity. Better uniformity improves crop timing, reduces quality variance, and usually improves real grams-per-kWh over a full year of cycles.
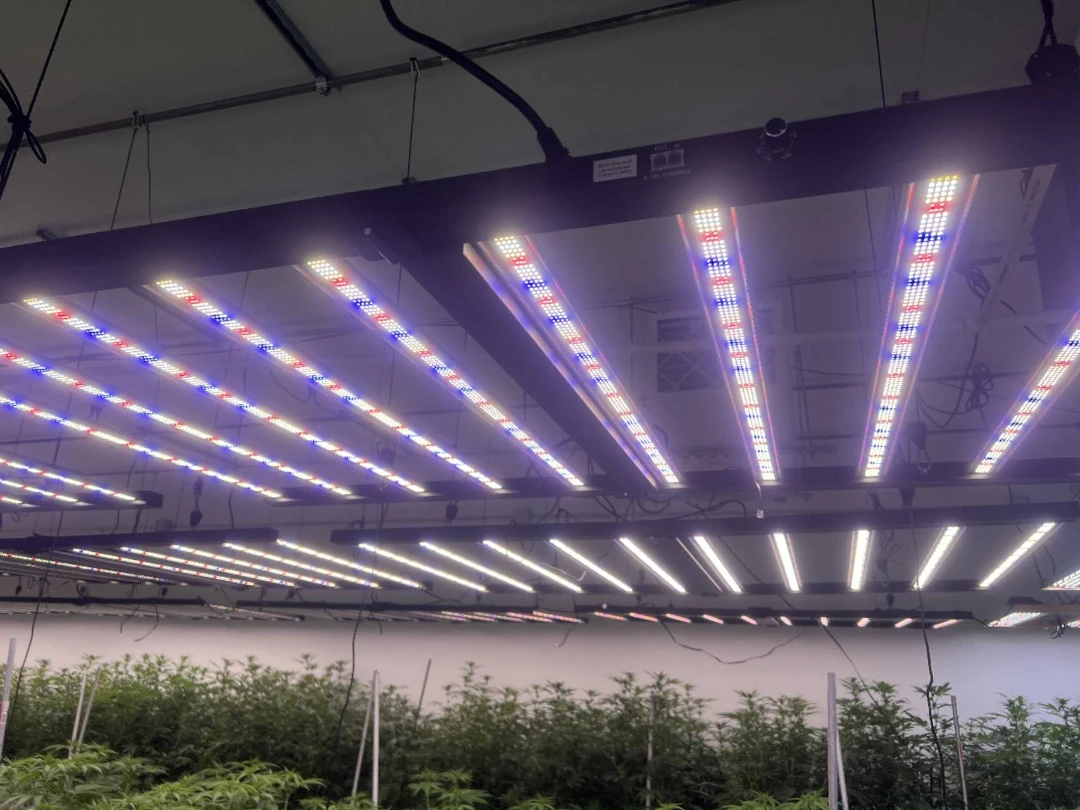
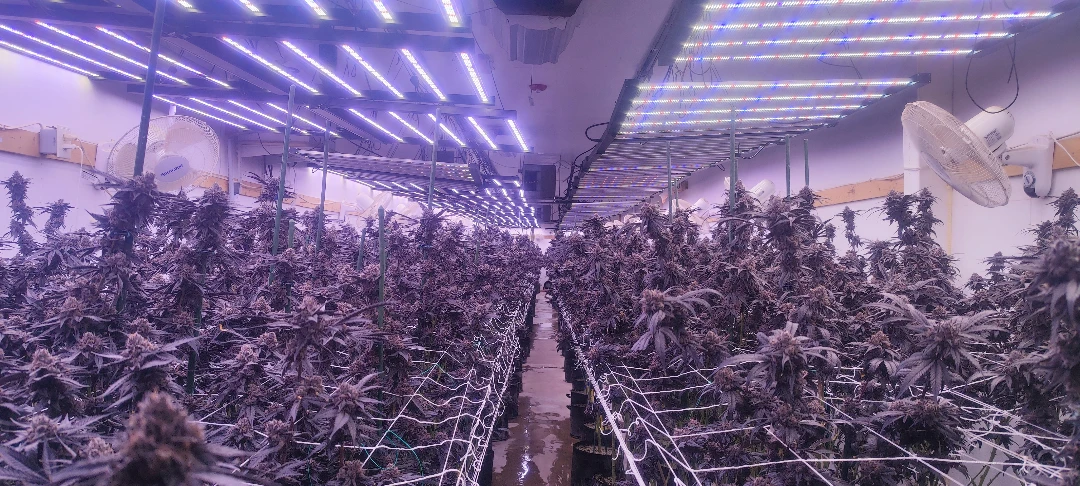
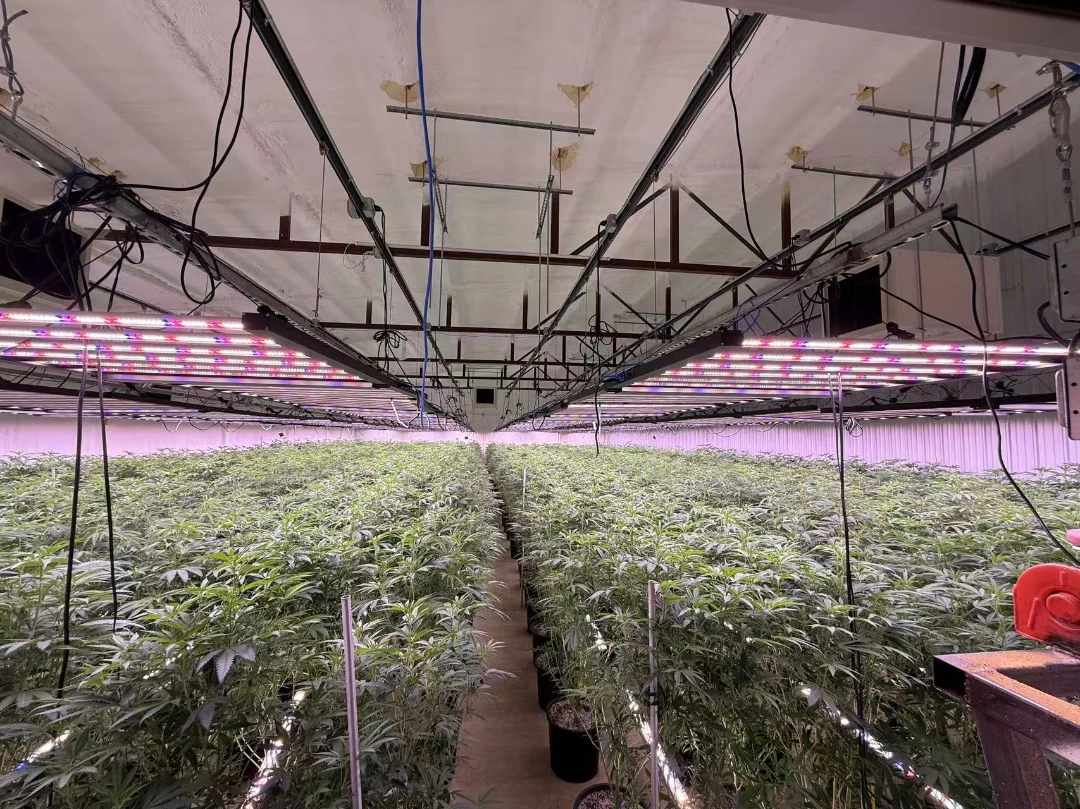
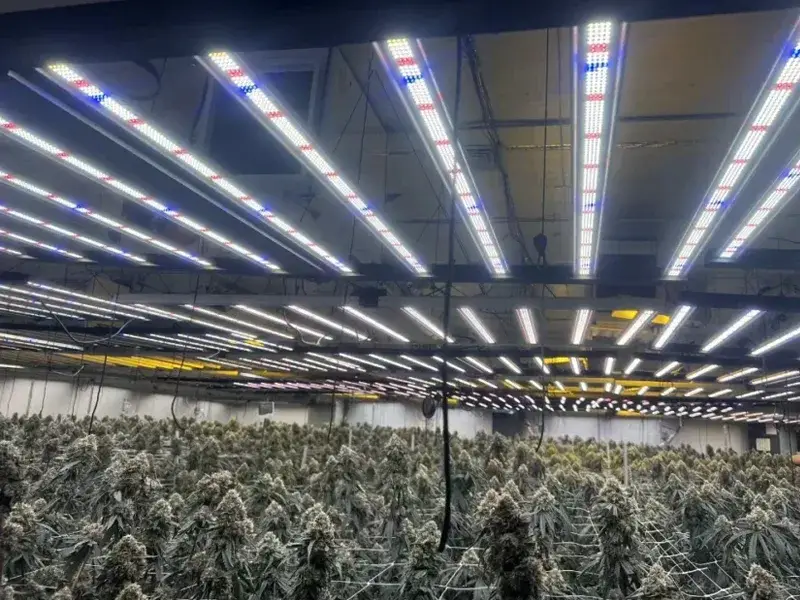
Step 3: Use overlap and mounting height to smooth the canopy
Many growers make the mistake of trying to cover a big area with one intense center fixture. That creates a bright center and weak edges. The fix is almost always: more overlap, higher mounting (within reason), and a layout that matches your canopy aspect ratio.
Higher mounting generally increases uniformity because the light spreads before it hits the canopy. But higher mounting can also reduce intensity if your total photon output is limited, so you balance height with fixture count and optics. In practice, dimmable fixtures let you mount for uniformity and dial in intensity, instead of running low and creating hot spots.
Step 4: Don’t ignore reflectivity and edge losses
Walls, floors, and benches affect how much light is effectively “lost.” Flat black surfaces absorb photons, while clean white surfaces reflect more photons back into the canopy. Edge zones typically receive less reflected light and fewer overlapping beam angles, which is why perimeter plants often underperform in poorly planned rooms.
If you’re optimizing led grow lights for cannabis in a room build-out, reflective wall finishes and tidy, bright floors can be an underrated “free PPFD” bonus. It won’t replace proper fixture density, but it can help your edges catch up.
Convert canopy targets into watts: the clean planning math
The core equation: PPFD → PPF → watts
If you know your target average PPFD and canopy area, you can estimate the total PPF you need:
Then convert photons to electrical power using fixture efficacy:
Power (W) ≈ PPF needed (µmol/s) ÷ Efficacy (µmol/J) (Because 1 W = 1 J/s, µmol/J converts directly.)
This is why efficacy matters so much: if you improve µmol/J, you reduce watts for the same canopy PPFD. DLC materials emphasize efficacy reporting and measurement conventions because it’s central to energy planning and fair comparisons. DesignLights
Why “watts per square foot” is an unreliable shortcut
You’ll still hear rules like “X watts per square foot,” but those rules break quickly because:
different fixtures have different efficacy,
different hanging heights and layouts change delivered PPFD, and
room reflectivity and overlap matter.
Two fixtures can both be “600W,” yet one delivers significantly more usable photons at the canopy due to higher µmol/J and better distribution. If you want repeatable results, plan with PPFD/PPF/DLI, not watts alone. yardandgarden.extension.iastate.edu
Electrical planning: think in circuits, not just total watts
Once you estimate lighting watts, translate that into electrical load with real-world constraints. Most indoor cannabis facilities hit bottlenecks in panel capacity, breaker space, and HVAC power long before they hit “we can’t buy more fixtures.”
A practical approach is to allocate:
one budget for lighting power,
one for HVAC/dehumidification, and
one for everything else (fans, pumps, controls).
Even for small grows, this mindset prevents the most common failure: “The lights run fine until summer, then breakers trip when AC and dehu kick on.”
Dimming isn’t just convenience—it’s a power and quality tool
If your fixtures are dimmable, you can:
ramp intensity gradually through veg,
avoid blasting small plants,
reduce stress during transitions, and
fine-tune PPFD once the canopy is fully set.
From a power-planning perspective, dimming gives you an “escape valve” if your environment can’t support maximum PPFD at certain times. This is especially useful when ambient conditions shift seasonally or when the room is at peak transpiration in late flower.
Worked examples: quick coverage and power estimates
Example 1: 4’×4′ canopy (typical tent flower)
A 4’×4′ canopy is about 16 ft², which is ~1.49 m² (since 1 ft² ≈ 0.0929 m²). Suppose you want an average 900 µmol/m²/s in flower for a strong baseline.
PPF needed ≈ 900 × 1.49 = 1341 µmol/s
If your fixture efficacy is 2.5 µmol/J, then: Power ≈ 1341 ÷ 2.5 = 536 W
That doesn’t mean “buy a 536W light.” It means your plan likely lands around the 500–650W class depending on distribution losses, height, and how much edge uniformity you want. If you target higher PPFD or want higher uniformity, you may use more total PPF (and therefore more watts) than the simple average math suggests.
Example 2: 4’×8′ canopy (two zones or one long canopy)
A 4’×8′ canopy is 32 ft² or ~2.97 m². If you target 1000 µmol/m²/s average:
PPF needed ≈ 1000 × 2.97 = 2970 µmol/s
At 2.5 µmol/J, Power ≈ 2970 ÷ 2.5 = 1188 W
This is where overlap planning becomes important. Two fixtures can often outperform one large fixture because overlap improves uniformity and reduces edge losses. If you’re serious about consistency, splitting the canopy into two evenly overlapped lighting zones is usually easier to dial in than trying to force one center source to cover 4’×8′.
Example 3: 10’×10′ flower canopy in a room
A 10’×10′ canopy is 100 ft² or ~9.29 m². If your flower target is 900 µmol/m²/s:
PPF needed ≈ 900 × 9.29 = 8361 µmol/s
At 2.4 µmol/J, Power ≈ 8361 ÷ 2.4 = 3484 W
This is a realistic “small commercial” lighting budget for that canopy size, but remember: you’ll likely need additional HVAC/dehu capacity that can match that heat load. If you decide to run 1100–1200 PPFD and/or add CO₂, your lighting power climbs, and so does your cooling and dehumidification requirement.
Spectrum choices: what matters (and what’s mostly marketing)
Full-spectrum white + red is a strong default
For most growers, full-spectrum white with some added deep red is a practical sweet spot. It tends to produce balanced morphology, good canopy penetration, and straightforward crop steering. If you’re planning led grow lights for cannabis across many cultivars, a balanced spectrum is often easier to standardize than an extreme “blurple” or overly red-heavy recipe.
The classic “why PAR focuses on 400–700 nm” and how plants respond across wavelengths traces back to foundational photosynthesis action spectrum work (often called the McCree curve). While modern cannabis-specific work is more recent, the foundational plant-light relationship is well established. ScienceDirect
Blue fraction: more than just “tight nodes”
Blue light influences morphology and can affect plant structure, but you don’t need extreme blue to grow high-quality flower. In cannabis lighting research, spectral shifts can change yield and fixture efficacy tradeoffs; for example, work examining blue photon fractions showed yield responses and also emphasized fixture efficacy differences across lighting types. PLOS
A simple grower-friendly framing is: use enough blue to maintain healthy structure and leaf function, but don’t sacrifice too much efficiency or canopy penetration chasing “ultra compact” plants. The best spectrum is the one that matches your room height, training method, and environmental control.
UV and far-red: consider them optional, not mandatory
There’s a lot of hype around UV and far-red for secondary metabolites, but the most honest planning approach is to treat these as optional tools, not core requirements. Recent controlled-environment research has found cases where UV did not provide commercially meaningful benefits for indoor production under some conditions, even when PPFD was high. Frontiers
Far-red can influence morphology and flowering responses in some crops, but it also complicates measurement (because traditional PAR is 400–700 nm). If you add far-red, do it intentionally and measure plant response carefully rather than assuming it’s universally beneficial.
Environment and HVAC: your lighting plan is only half the system
All electrical watts become heat (eventually)
Even efficient LEDs turn almost all input power into heat in the room—some as immediate radiant heat, some as convective heat through heatsinks, and some through driver losses. The reason LEDs often feel cooler than HPS is mainly because they can reduce intense radiant heat hitting the canopy, allowing closer mounting and different leaf temperature dynamics.
What this means for planning is simple: if you add 3.5 kW of lighting, you should expect roughly 3.5 kW of heat load that your cooling system must handle, plus additional latent load from transpiration as plants grow bigger.
Higher PPFD usually demands better transpiration control
As light increases, plants generally photosynthesize more (up to limits) and often transpire more, which increases humidity load. If your dehumidification can’t keep up, you end up running colder air to “hold RH,” which can create leaf temperature problems and slow growth.
So when you ask, “Can I push to 1200+ PPFD?” the better question is: Can my room maintain stable VPD and leaf temperature at that intensity day after day? If not, you may get better results at a slightly lower PPFD with stable conditions than at a higher PPFD with constant stress swings.
CO₂ and high light must be matched deliberately
High PPFD and supplemental CO₂ often work well together, but only if temperature, airflow, and nutrition support higher photosynthetic rates. Cannabis photosynthesis studies frequently discuss how PPFD interacts with other environmental variables rather than acting alone. PMC
If you plan to enrich CO₂, treat it like a system upgrade: it can increase your “photon utilization,” but it also raises the importance of temperature control and uniform distribution across the canopy.
Measure and verify: don’t “set and forget” your lighting
Map PPFD with a grid, not a single reading
A single PAR meter reading under the center of a fixture is almost meaningless for planning coverage. Instead, measure a grid across the canopy (for example, every 1 ft or 30 cm), record the values, and calculate the average and the “weak zones.” This is how you catch edge losses, uneven overlap, and layout problems before they cost you a full cycle.
If you’re learning PPFD/DLI concepts and want a simple horticulture-friendly reference for intensity and DLI definitions, extension resources like Iowa State’s indoor supplemental lighting guidance can help ground the terminology. yardandgarden.extension.iastate.edu
Use DLI as a weekly “sanity metric”
Once you know your average PPFD and photoperiod, you can estimate DLI and track whether your lighting decisions are consistent. If you dim your lights due to heat, or raise them to improve uniformity, DLI helps you understand what changed in plant terms, not just human terms.
Virginia Tech’s DLI explanation is especially helpful for understanding the PPFD-to-DLI relationship without needing advanced math. Virginia Tech Publications
Maintain output: dust and drift are real
Dust on diodes, aging drivers, and environmental buildup can reduce light output over time. Regular cleaning and periodic re-mapping keep your room consistent. If you run multiple rooms, consistent measurement and maintenance are often the difference between “one room always crushes it” and “results are all over the place.”
Buying checklist for cannabis coverage and power planning
Prioritize the specs that affect planning
When comparing led grow lights for cannabis, focus on planning-critical specs first:
Efficacy (µmol/J) for power budgeting and operating cost.
PPF (µmol/s) for total photon delivery potential.
Distribution and recommended mounting height for uniformity.
Dimming range and control compatibility for ramping and fine tuning.
Thermal design and driver quality for long-term stability.
DLC technical documents are useful for understanding which performance fields are commonly reported and how efficacy and wattage are treated in standardized testing contexts. DesignLights
Think in layouts, not “one fixture”
A better purchasing mindset is: “What layout hits my target PPFD with high uniformity?” rather than “What’s the strongest fixture?” For example:
Square canopies often benefit from symmetric multi-fixture overlap.
Long canopies often benefit from two or more fixtures spaced evenly down the length.
Low ceilings usually require more fixtures (more overlap) at lower mounting height to avoid hot spots.
This layout-first approach is what makes your power estimate reliable, because you’re planning delivered photons, not just buying a “watt class.”
Match the fixture to your workflow
If you run perpetual harvests, you’ll value dimming, consistent output, and repeatability more than “peak PPFD in the center.” If you run many cultivars, you’ll value uniformity because it reduces cultivar-to-cultivar lighting sensitivity. If you’re optimizing cost, you’ll value efficacy because it reduces ongoing electricity—and often reduces HVAC demand per unit of delivered light.
Research on cannabis yield vs. light intensity underscores why delivered canopy light and whole-room strategy matter more than a single headline spec. PMC
Practical takeaways and a simple planning workflow
A repeatable 6-step plan
Measure or define your true canopy area.
Choose a realistic target PPFD for each stage (especially flower).
Use the equation PPF ≈ PPFD × area to estimate total photons needed.
Use watts ≈ PPF ÷ efficacy to estimate lighting power.
Select a layout that maximizes uniformity (overlap + mounting height + spacing).
Verify with a PPFD grid and track DLI to keep results consistent.
This workflow is simple enough for a tent grower and scalable enough for a multi-room facility, because it’s built on the same physics and plant metrics either way.
The bottom line
If you want consistent, high-quality harvests, your lighting plan should be built around coverage uniformity and photon delivery, then translated into watts using efficacy. That’s how you avoid the common traps: overbuying power you can’t cool, under-covering edges, or chasing “watt rules” that don’t match modern LED performance.
When your canopy, photons, power, and HVAC are designed as one system,led grow lights for cannabis stop being a guessing game—and start being a controllable input that you can optimize cycle after cycle.