Introduction
Large-scale facilities are moving away from high-pressure sodium (HPS) for a simple reason: LED fixtures convert electricity into photosynthetically active photons far more efficiently, hold their spectrum and output consistently over a 50,000-hour service life, and typically pay for themselves well within the fixture’s lifetime. However, to successfully transition HPS to LED cannabis operations, operators must realize that yield is not protected by the fixture alone. HPS radiates a large amount of heat onto the canopy, and that radiant load quietly does a job your HVACD system has to take over once you convert
The catch is that yield is not protected by the fixture alone. HPS radiates a large amount of heat onto the canopy, and that radiant load quietly does a job your HVACD system has to take over once you convert. Swapping lamps without re-anchoring your light targets, climate setpoints, and controls is how operators lose yield, see photobleaching, and chase humidity problems during the transition.
Your objective in this guide is to preserve — ideally improve — yield and operational stability while your facility makes the switch. That means setting measurable PPFD and DLI targets, managing VPD using leaf temperature rather than air temperature, mapping the delivered light for uniformity, and ramping output gradually through dimming and acclimation. We’ll walk through each of those, then cover controls, compliance, and the ROI and rebate math that sequences a phased rollout.
Lighting Targets and Climate Setpoints
Stage-specific PPFD and DLI ranges
Light is the single largest lever on cannabis yield, so your retrofit starts with explicit targets per stage, not a generic brightness guess. Two numbers matter: PPFD, the instantaneous photosynthetically active photon flux density in µmol/m²/s at the canopy, and DLI, the daily light integral in mol/m²/day — the total photons your plants receive over the photoperiod.
Common commercial operating ranges, which SLTMAKS documents by growth stage, look like this:
| Stage | PPFD (µmol/m²/s) | Photoperiod | Approx. DLI (mol/m²/day) |
|---|---|---|---|
| Seedlings / clones | 100–300 | 18–24 h | 6–20 |
| Vegetative | 300–600 | 18 h | 20–40 |
| Early flower / stretch | 600–800 | 12 h | 26–35 |
| Mid–late flower | 800–1,000 | 12 h | 35–50 |
| Flower with CO₂ enrichment | 1,000–1,500+ | 12 h | 43–65 |
Push into the higher end of flower only when CO₂, VPD, irrigation, and nutrition can keep pace. Below about 700–900 µmol/m²/s without CO₂ enrichment, plants hit diminishing returns before light becomes the bottleneck; above it, you’re paying for photons the crop can’t metabolize. Define your targets before you buy a single fixture, then validate them at the canopy with a quantum sensor.
VPD Using Leaf Temperature, Not Air
Vapor pressure deficit (VPD) is the difference between the vapor pressure inside the leaf and the surrounding air, and it drives transpiration, nutrient uptake, and stomatal behavior. The common mistake during a retrofit is calculating VPD from air temperature while ignoring leaf temperature — but leaf temperature is exactly what changes when you remove the radiant heat of HPS.
Under HPS, a hot bulb warms the canopy so leaf temperature runs a few degrees above air. LEDs emit almost no radiant heat, so leaf temperature falls toward (and sometimes a fraction below) air temperature. If you hold air temperature and RH at your old HPS setpoints, the real VPD the plants experience changes — transpiration slows, humidity pockets form, and mold risk climbs.
The fix is to keep your proven VPD targets but measure leaf temperature with an infrared thermometer or leaf sensor and re-derive VPD from the actual canopy reading. Industry guidance from Cannabis Business Times on HPS-to-LED conversion notes that growers retrofitting from HPS to LED can keep the same VPD targets while raising HVAC air-temperature setpoints — commonly by roughly 7–8 °F in flower — to restore the same evaporative environment the canopy had under HPS.
Temperature and RH Adjustments When You Transition HPS to LED Cannabis
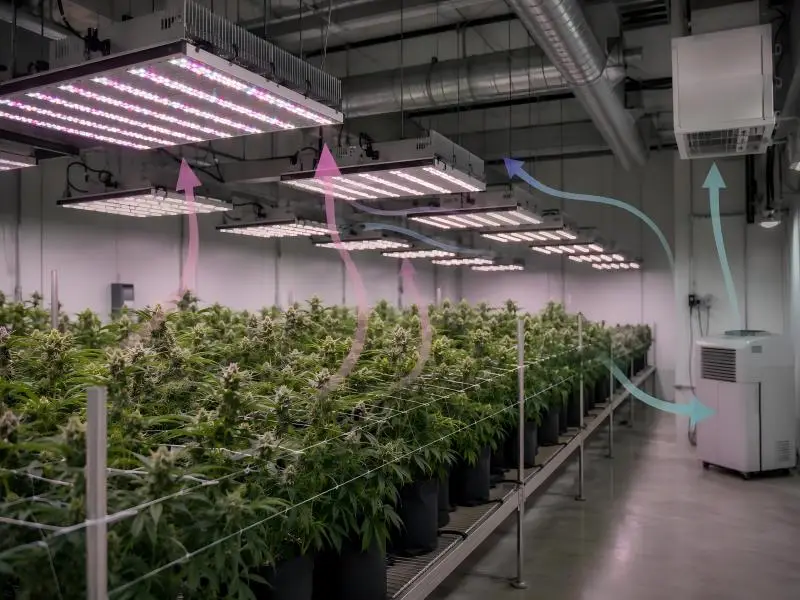
Because LEDs shed most of their heat as conduction rather than radiation, the room behaves differently. Where HPS previously contributed radiant warmth to keep canopy temperature up, an LED room now relies on air temperature alone — so you typically raise the lights-on air setpoint and rebalance dehumidification.
These are the climate levers to adjust through the transition:
- Raise air temperature modestly after conversion to restore target leaf temperature and VPD.
- Increase dehumidification, since less radiant heat slows transpiration and raises localized RH.
- Add air movement at and below the canopy to prevent stagnant, high-humidity pockets.
- Watch the night setback: with less thermal mass from lights, the lights-off drop can be more pronounced, so protect against condensation.
Fixture Selection and Uniformity Mapping
Full-spectrum Baseline and Efficacy over Spectrum Add-ons
Fixture choice matters more than almost any spectrum tweak. Start with a high-efficacy, full-spectrum baseline that maximizes photons per watt, and treat spectrum add-ons (far-red, UVA, enhanced blue) as refinements to evaluate against yield evidence rather than features that headline the purchase. A fixture that delivers 3.0+ µmol/J with a broad spectrum and good thermal management will carry your room further than a one that leans on a single marketing channel of the spectrum.
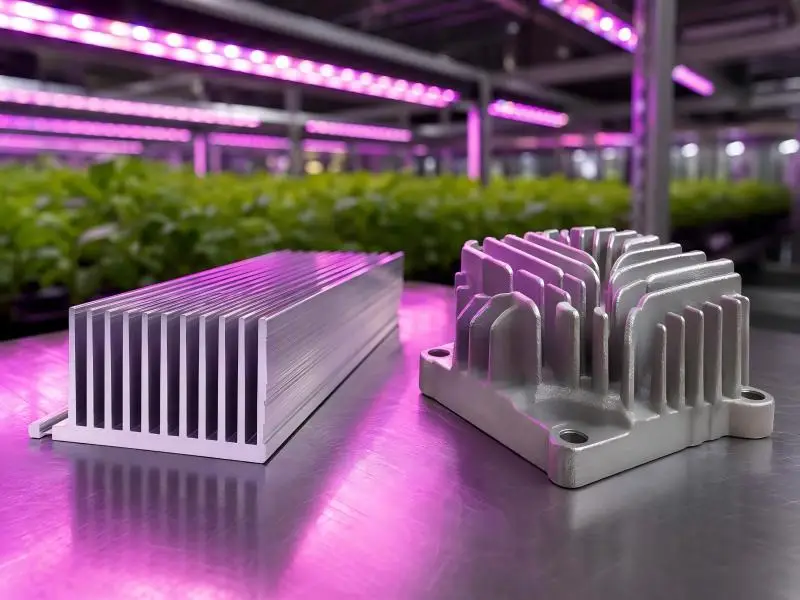
Thermal management and reliability are part of efficacy. A full-spectrum LED design that keeps junction temperatures low holds its output and spectrum over its rated life, which is why robust passive aluminum heat sinks and proven driver platforms matter in a commercial room. Reliability also shows up in the warranty and certifications a supplier is willing to back — a long comprehensive warranty and a clear trace of the emitter source both signal engineering confidence. Full-spectrum fixtures built around industry-leading Samsung diodes, for example, combine high photon efficiency with durable thermal packaging, and international safety certifications provide the documentation an inspector or rebate administrator expects.
Spacing, Height, and PPFD Grid Mapping for ±10–15% Uniformity
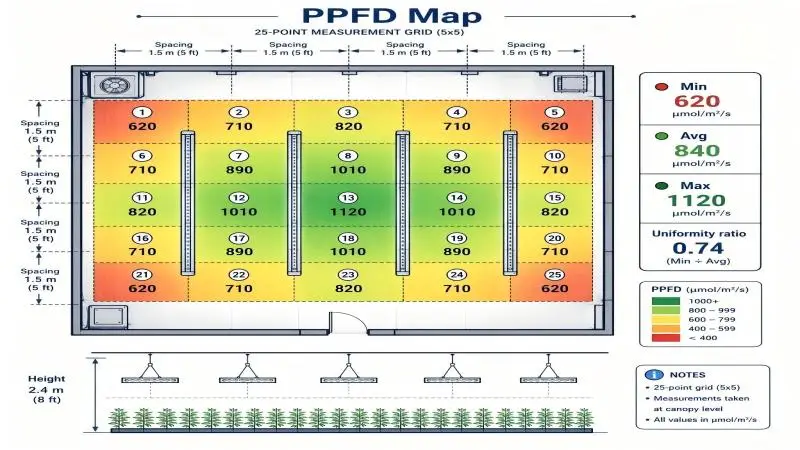
Uniformity is the single most direct yield-protection lever in the retrofit. Gaps or hot bands in the delivered light mean some plants are under-driven, and others are light-stressed; both cost you grams per square meter. The practical standard is to map PPFD across the canopy and keep readings within roughly ±10–15% of the average across the planted footprint, which corresponds to a minimum-to-average uniformity ratio of about 0.8 or better.
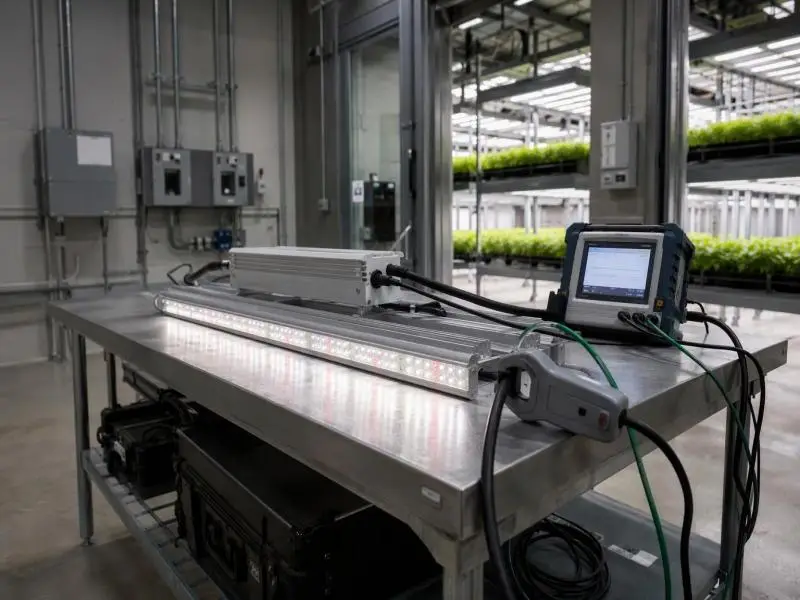
Work from the manufacturer’s PPFD map, then verify in the room:
- Define the measurement plane — the top of the mature canopy, measured from the fixture’s emitting surface, not the floor.
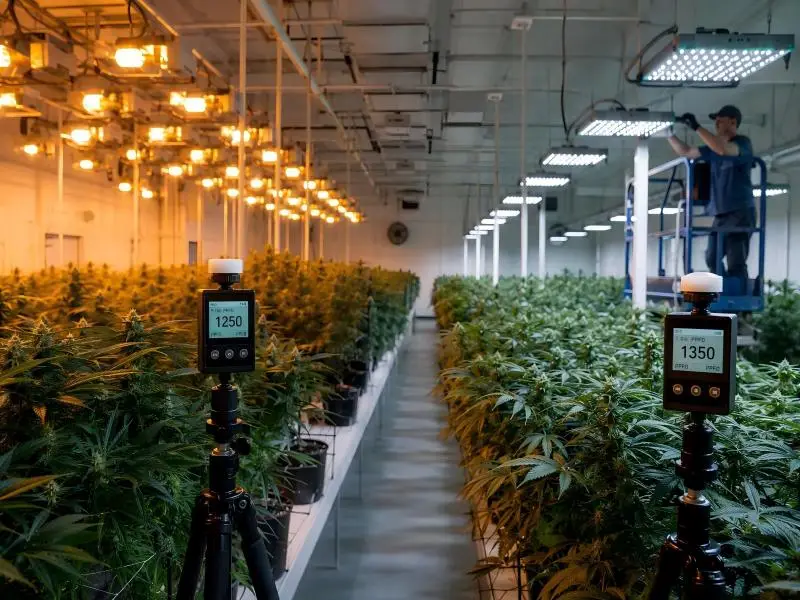
- Map a grid of at least 9 points per fixture footprint (9×9 or 16-point for large rooms), with extra readings at edges, corners, and fixture overlap zones.
- Record minimum, average, and maximum PPFD and the uniformity ratio so you can see if a change helped the whole room or just moved a hot spot.
- Set spacing so adjacent fixtures’ overlap fills the low-PPFD corridor without creating a bright stripe. Bar-style fixtures generally tolerate closer center-to-center spacing than point-source designs.
- Set height inside the fixture’s documented range — commonly 12–24 in above canopy in flower — using height to smooth overlap; raising fixtures reduces hot spots, lowering them raises center intensity but sharpens edge falloff.
The infographic below summarizes the mapping workflow and the numbers that tell you whether uniformity is protecting yield.
Remapping after Canopy Changes and Stretch
A map is only valid for the canopy it was taken on. During stretch — especially the first three weeks of flower — the canopy top rises, the effective lighting plane moves, and a layout that looked uniform a week ago can develop dark edges or a hot center. Plan to remap at the new canopy top after stretch, defoliation, fixture moves, or any meaningful dimming change. If the new map shows edge darkening, first raise the fixtures slightly, then refine spacing, then use dimming or perimeter fixtures. SLTMAKS’s commercial grow light layout guidance walks through defining the measurement grid and tuning layout to keep uniformity within tolerance.
Dimming and Acclimation Protocol
Week-by-week Output Ramp with Sunrise/Sunset Curves
The fastest way to injure a crop during conversion is to switch from HPS to a fully powered LED overnight. The canopy is adapted to one photon flux and one spectrum; a sudden jump in delivered PPFD — especially with a spectrum the plant hasn’t seen at that intensity — invites photobleaching and stress. Ramp instead.
A practical acclimation sequence, close to the staged approach Fluence recommends for HPS-to-LED cannabis conversions:
- Week 0: install and map the room; measure canopy PPFD and leaf temperature to establish the baseline.
- Week 1: run LEDs at a reduced output, verify delivered PPFD and DLI against target, and watch for stress signs.
- Weeks 2–3: raise output in small increments until the stage-appropriate PPFD/DLI is reached, correcting HVAC, RH, and airflow in step to hold VPD stable.
- Flower transition: move conservatively through stretch and early flower, ramping room conditions alongside intensity.
Program sunrise and sunset curves where the control system supports them, so the photoperiod eases in and out instead of slamming on and off. That soft start limits the instantaneous climate swing at lights-on, which is another place humidity spikes in an LED room.
Using Dimming to Set Intensity after Height for Spread
After you’ve set height for spread and uniformity, use dimming to dial in the delivered intensity — not the other way around. Dimming lets you meet a target PPFD/DLI across the whole room without raising or lowering fixtures and re-breaking the overlap. It is also the mechanism for your acclimation ramp: load a staged dim curve in the controller once, rather than walking the room to adjust fixtures by hand.
Validation Checkpoints: Plant Response, PPFD Remap, and Climate Stability
Treat each ramp step as a checkpoint rather than a set-and-forget change. Before you increase output, confirm three things: plant response looks normal (no interveinal bleaching, no leaf cupping or tip burn), the PPFD map at the new setting still meets uniformity, and climate is stable — VPD held within tolerance, RH under control, and no condensation. Document each step so the acclimation curve becomes a reproducible SOP for the next room.
Controls, Compliance, and Safety
Dimming Protocols and Networking: 0–10V, DALI, PWM
Your dimming protocol determines how granular and how future-proof the control is. Match the protocol to the driver before you buy, because many retrofit failures start with a control incompatibility that was never flagged until installation.
- 0–10V is the simplest and lowest-cost commercial option. It is analog and group-controlled — every driver on the same control line dims together — so it suits broad room, bench, or zone dimming rather than per-fixture recipes.
- DALI adds individual addressability, scene recall, and fault reporting over a two-wire digital bus. Use it when you need different intensity schedules across benches or aisles, or when you want two-way diagnostics and BMS integration.
- PWM delivers very precise output and is best reserved for low-voltage or color-critical specialty applications, not as the default for large-area retrofit lighting.
For most retrofit rooms, 0–10V zones are enough; reserve DALI for facilities that want per-fixture control and richer commissioning records.
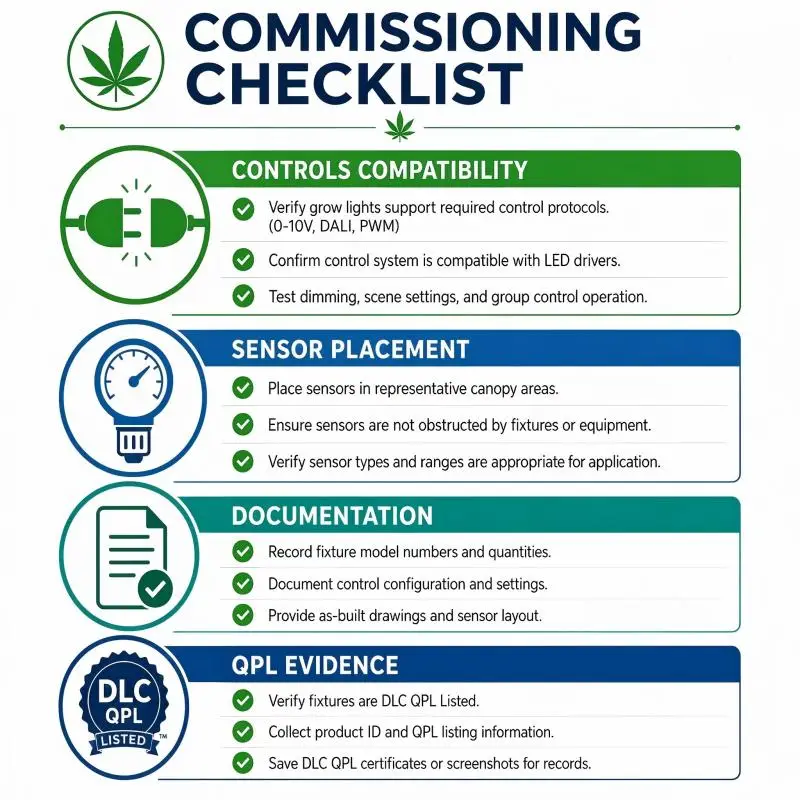
Commissioning Steps: Zoning, Sensors, Curves, Fail-safes, Logging
Commissioning is where a design becomes a working, defensible system. Work through it room by room:
- Verify protocol and wiring match the drivers before energizing.
- Define zones — group fixtures that need to dim together.
- Place and confirm sensors (PPFD, leaf temp, RH, CO₂) in representative canopy locations.
- Load the dimming/acclimation curve and run a full-range sweep to confirm minimum stable output and smooth ramping.
- Configure fail-safes so a lost sensor or network fault fails to a safe output rather than full power.
- Log setpoints, dimming curves, and mapping results for both troubleshooting and rebate/inspection files.
The checklist infographic below condenses these into a form your crew can work against.
Certifications: UL/ETL, CE, RoHS; DLC Horticultural QPL for rebates
Certification is both a safety gate and a rebate gate, and it varies by market. UL/ETL (or another NRTL listing) is what inspectors and insurers typically require for a luminaire in the U.S. — confirm the assembled configuration is listed, not just the individual components. CE signals conformity with applicable EU requirements and matters for the European market. RoHS restricts hazardous substances and is largely a supply-chain requirement, but keep the documentation.
For incentives, the DLC Horticultural QPL (Qualified Products List) is the central gate: many utility rebate programs only pay out if the installed fixture appears on the current QPL and the as-installed configuration — driver, spectrum, controls, wattage — matches the listed model. If a retrofit changes the dimming configuration, verify the final setup still falls within the listing. SLTMAKS’s LED grow lights for cannabis, built on Samsung diodes, carry ETL, CE, and RoHS certification and a 3-year warranty, which makes the compliance documentation easier to assemble for inspection and incentive files.
ROI, Rebates, and Deployment Timeline
Utility Incentives and Typical Payback Windows
The business case for conversion is stronger than raw energy math suggests, because rebates and HVACD savings stack onto the lighting kWh savings. Typical commercial HPS-to-LED retrofits land in the roughly 1.5–3 year simple-payback range, with high-runtime rooms and strong incentives pulling that under a year in favorable cases and a 2–4 year horizon when rates are cheap or rebates are thin.
Utility incentives come in two forms. Prescriptive rebates offer a fixed amount per fixture or per watt replaced (examples range from around $79 per fixture up to $50–250 per fixture, or $0.80–1.00 per watt). Custom rebates pay on measured savings and can cover a larger share of project cost — commonly 20–40% and sometimes higher — but require more metering and verification. Because many programs require pre-approval and QPL listings, start the application at the design stage, not after the fixture order.
Whole-room Optimization: Lighting, HVACD, CO₂, Irrigation
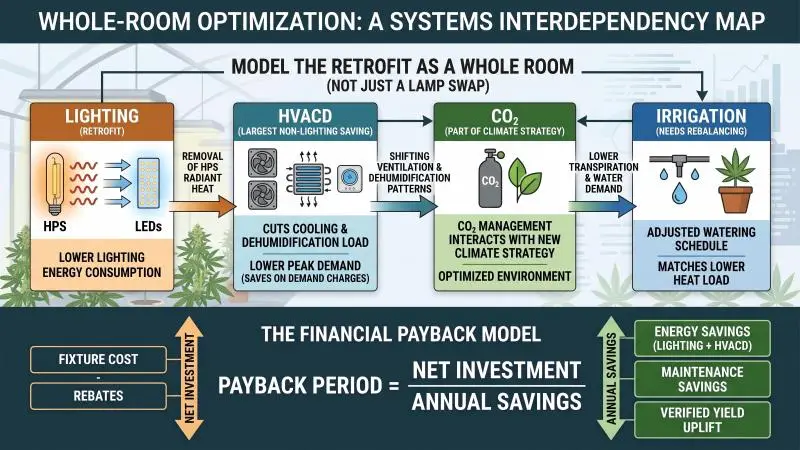
Model the retrofit as a whole room, not a lamp swap. The largest non-lighting saving is HVACD: removing HPS radiant heat cuts cooling and dehumidification load, and lower peak demand can trim demand charges in rate structures that penalize them. CO₂ interacts with your climate strategy, since ventilation and dehumidification patterns shift; treat it as part of the environmental-control economics rather than a standalone line item. Irrigation may need rebalancing because lower radiant heat changes transpiration and water demand. Fold all of these into the payback model — the formula is net investment (fixture cost minus rebates) divided by annual savings including energy, HVACD, maintenance, and any verified yield uplift.
Sequencing Multi-room Retrofits and Pre-approvals
If you can’t convert the whole facility at once, phase it. Sequence rooms by the highest-return combination of operating hours, HPS inefficiency, utility rate, and HVAC/dehumidification burden, and roll out one room at a time to protect harvest continuity. Each completed room becomes the commissioning reference and the source of the refined SOP for the next. Align each room with the utility’s application timing so later phases don’t miss program windows or annual cap limits, and keep the QPL and commissioning documentation organized per room for inspection and rebate verification.
Conclusion
The theme across every step is the same: protect yield by protecting the environment the plants experience, not by swapping hardware. Map the delivered light for ±10–15% uniformity so no plant is under- or over-driven, measure VPD from leaf temperature rather than air so transpiration stays balanced once the radiant heat disappears, and ramp LED output gradually through dimming so the canopy adapts instead of getting shocked.
Before you commit to a rollout, verify your control system and drivers are compatible with the protocol you plan to run, document your mapping, commissioning, and certification evidence for inspectors and rebate programs, and model the ROI with HVACD, CO₂, irrigation, and utility incentives included. Do those three things, and the transition from HPS to LED becomes a step toward higher, more consistent, and more efficient harvests — not a leap with fingers crossed.
FAQ
Is it worth switching from HPS to LED for cannabis?
Is it worth switching from HPS to LED for cannabis?
For most commercial rooms, yes. Modern LEDs convert electricity into usable photons far more efficiently, with reported savings commonly landing in the 30–60% range for lighting energy, and they run cooler, which trims HVAC load on top of that. The main tradeoff is upfront cost — an all-LED system can run three to four times the price of an all-HPS setup — but when you add utility rebates and the lower cooling and maintenance bills, the LED vs. HPS comparison usually favors LED on total cost of ownership within a few years. Independent grow-test comparisons also tend to show equal or better bud quality under modern LEDs, so the switch protects yield rather than giving it up.
Does switching to LED cause more stretch or heat problems than HPS?
Does switching to LED cause more stretch or heat problems than HPS?
Not for the reasons you might expect. HPS dumps far more radiant heat onto the canopy, which is why LED rooms typically run cooler and need less cooling capacity. Stretch is a bit different: HPS’s heavy red/IR output tends to produce taller, lankier growth in veg, while LED keeps internodes more compact — a difference many growers notice after a conversion. The real trap is that removing HPS’s radiant heat changes the evaporative environment. Leaf temperature falls relative to air temperature, so your old air-temperature setpoints no longer produce the same VPD, and plants may transpire less while localized humidity rises. Keep your VPD targets, but measure leaf temperature and raise air setpoints and dehumidification to match, as detailed in the climate section above. That’s where most “LED causes problems” stories actually start.
What PPFD and DLI should I target for flowering under LED?
What PPFD and DLI should I target for flowering under LED?
In flower, run between roughly 600–1,000 µmol/m²/s of PPFD at the canopy on a 12-hour photoperiod, which works out to about 26–43 mol/m²/day of DLI. That range works well at ambient CO₂. If you’re adding CO₂ enrichment and can keep VPD, irrigation, and nutrition in step, push into the 900–1,500 µmol/m²/s range for a DLI of roughly 35–65 mol/m²/day. Below about 700–900 µmol/m²/s without CO₂, you hit diminishing returns; above the enriched ceiling, you’re paying for photons the crop can’t metabolize. Verify your target at the canopy with a quantum sensor and map the delivered light across the whole footprint so no plant is under- or over-driven.