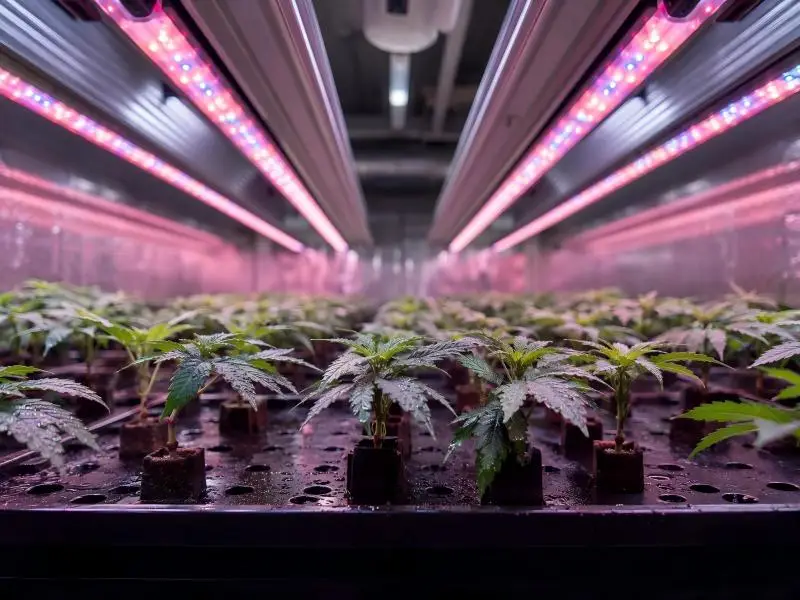
Most guides hand you a single PPFD number for the whole propagation cycle. This guide instead gives you a staged rooting clones LED spectrum recipe, with setpoints for each phase and a per-cultivar A/B method you can run on your own bench to confirm it.
You will need a PAR meter or a mapped PPFD grid, dimmable multi-channel fixtures with independent blue, red, and far-red channels, a data logger for DLI, and baseline records from your last two or three propagation runs. Budget roughly 45 minutes to set the first recipe and one full cycle to validate it.
The honest framing up front: spectrum is one lever among several. Intensity, photoperiod, and VPD move rooting outcomes at least as much, and the published horticulture reviews support red-dominant spectra with a blue complement as the usual starting point rather than a guaranteed winner (Cavallaro et al., 2025). Typical propagation-bench PPFD ranges sit at 100–300 µmol·m⁻²·s⁻¹ (P.L. Light Systems, 2020), and clone rooms commonly run 18–24 hour photoperiods, where the 18-hour versus 24-hour DLI arithmetic works out to roughly 33% more daily light at the longer schedule (SLTMAKS). Treat those as the envelope, not the answer.
SLTMAKS is a global provider of professional-grade LED grow lights, engineering full-spectrum lighting with advanced thermal management to bring the benefits of natural sunlight indoors. Its work centres on spectral science and phyto-illumination for growers ranging from home hobbyists to large-scale commercial operators, which is the same ground this article covers on rooting clones with specific LED spectra.
Introduction
A controlled rooting clones LED spectrum shortens the time from stick to transplant without trading away root quality. This guide gives you staged spectral recipes, PPFD, photoperiod, and DLI targets for each propagation stage, and the checkpoints that make them repeatable. Typical propagation-bench PPFD ranges sit at 100–300 µmol·m⁻²·s⁻¹, with DLI quoted per stage rather than as one number (P.L. Light Systems, 2020). Spectrum is one lever among several, so validate each recipe with a small A/B trial per cultivar before you scale it.
Table of Contents
Spectrum Essentials Specific LED Spectra
Blue, Red, Far-Red Roles
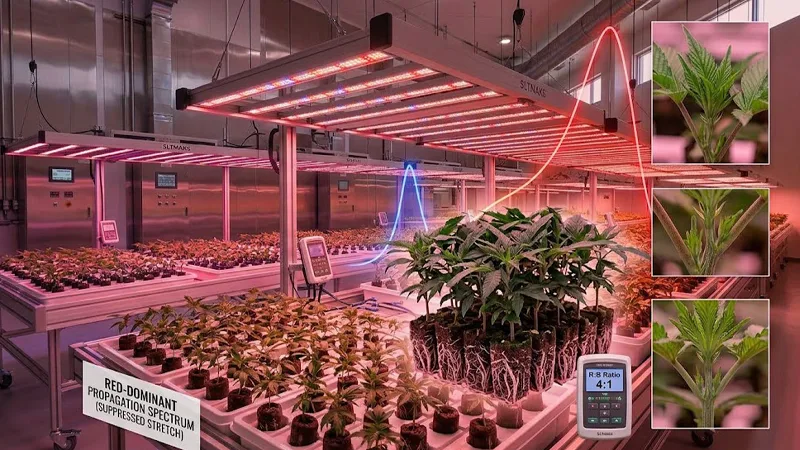
A rooting recipe is a ratio problem before it is an intensity problem. Red light supplies most of the photosynthetic drive that a cutting can use before it has roots, which is why commercial propagation spectra are red-dominant with a blue complement rather than blue-heavy. Blue’s morphological role in propagation is structural: it suppresses stretch and builds compact growth, so it shapes what the cutting looks like, not how fast it initiates roots. That distinction matters when you are reading a spectrum chart, because a blue spike is doing architecture work, not root work.
Avoiding Elongation Risk
Far-red is the waveband most often misapplied during rooting. Its effect runs through the phytochrome R:FR ratio: a low R:FR, meaning too much far-red, signals shade avoidance and elongation, while a higher R:FR keeps plants compact. During rooting specifically, excess far-red is framed as harmful because it directs the cutting to stretch rather than root (SLTMAKS, “The Mechanism of Far-Red Light in Inducing Rapid…”, retrieved 2026-03-05). That is the mechanism behind the common advice against running far-red for rooting cuttings at full strength.
⚠️ Warning: A low R:FR ratio during rooting pushes stretch, not root initiation. If internodes are lengthening before roots show, check far-red before you touch PPFD.
Balancing Spectrum for Uniformity
Treat spectrum as one lever among three. Intensity and photoperiod usually move rooting outcomes more than waveband choice does at the clone stage, and a well-balanced blue to red ratio for clones will not rescue a room with uneven PPFD or a drifting VPD. The practical goal is uniformity: the same ratio and the same delivered light at every tray position, so that differences you see later can be attributed to environment or genetics rather than to position under the fixture.
Rooting Clones LED Spectrum
Set the rooting clones LED spectrum recipe before the first tray goes in, because the stick-to-callus DLI window is narrow: 4–5 mol·m⁻²·d⁻¹ with a peak PPFD cap of ≤200 µmol·m⁻²·s⁻¹ (SLTMAKS, “Why Low PPFD and Diffused Light Win for Cannabis Cloning”, retrieved 2026-07-28). Intensity, not colour, does most of the work at this stage.
Starting Spectral Recipe
Set a mixed white-plus-red baseline and hold it. Freshly stuck, unrooted cuttings target roughly 50–90 µmol·m⁻²·s⁻¹ instantaneous PPFD, with a higher ceiling once the tray is stable (SLTMAKS, retrieved 2026-07-28). Verify with a meter at canopy height across at least three points per tray before you commit the recipe to a controller.
When to Add Far-Red Briefly
Add far-red only as a short end-of-day dose, and only once the tray holds the 50–90 µmol·m⁻²·s⁻¹ starting band steadily. The phytochrome mechanism that makes far-red useful for extension is the same one that stretches cuttings when it runs all day, so the exit condition is the dose: if internodes lengthen between checks, cut the far-red window rather than raising blue.
Adjusting Blue: Red for Compactness
Adjust the blue to red ratio for clones when growth habit, not speed, is the problem. More blue compresses internodes; more red favours expansion. Change one channel at a time and re-measure after several days, since a single shift in ratio is hard to read against normal stage progression.
PPFD, Photoperiod, and DLI by Stage
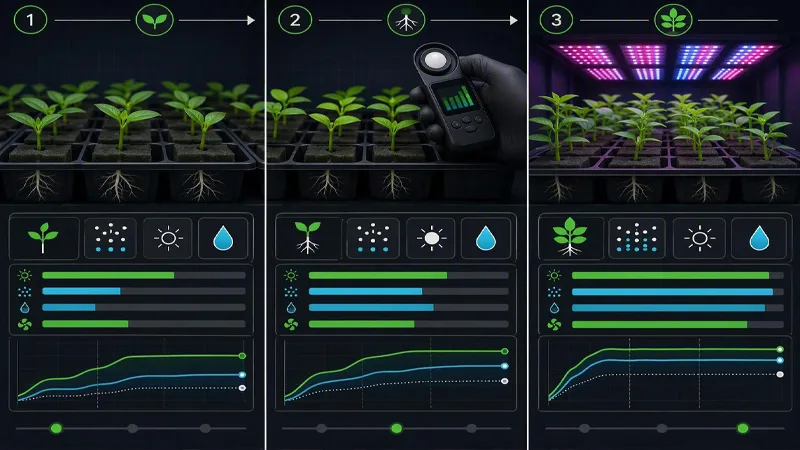
A propagation room needs three different light setpoints, not one. The stage targets below give you PPFD and DLI for propagation as a ladder: low and humid while callus forms, brighter once roots push, then closer to vegetative conditions as plants tone up.
Stage 1: Stick to Callus
By the end of this stage, you want callus tissue forming and no root initials yet, so keep light modest and hold the canopy in a high-humidity envelope. Run 18 hours on, 6 off rather than continuous light: the dark period lets the cuticle recover and costs you nothing in daily light. Hold the room at the day 0–7 VPD and humidity targets of 0.4–0.6 kPa, 74–77 °F air, and 90–95% RH (iwantclones, “VPD for Cannabis Clones”, retrieved 2026-07-05).
- Set photoperiod to 18/6 and log it.
- Hold PPFD low enough that leaves stay flat, not cupped.
- Verify daily: no wilting, no stretch, media still turgid.
Stage 2: Root Elongation
By the end of this stage, roots are visible at the plug wall. This is where you raise PPFD and DLI for propagation, because rooting cuttings now have a sink for the extra energy. After the first roots appear, raise toward a DLI of 6–8 mol·m⁻²·d⁻¹, and later 8–12 mol·m⁻²·d⁻¹ (SLTMAKS, “Low PPFD and Diffused Light”, retrieved 2026-07-28). Keep the blue to red ratio for clones weighted toward blue here so internodes stay tight, and step the environment to the day 7–14 VPD and humidity targets of 0.5–0.8 kPa, 74–78 °F, 85–90% RH (iwantclones, retrieved 2026-07-05).
- Raise PPFD in two increments, not one jump.
- Log DLI daily; stop raising when leaf temperature climbs.
- Verify: roots at the plug wall within the expected window.
Stage 3: Hardening and Toning
By the end of this stage, the clone is ready to transplant. Push toward the top of the DLI range, shorten nothing on photoperiod yet, and let VPD rise to the hardening-off VPD and humidity targets of 0.6–1.0 kPa, 75–80 °F, 70–85% RH (iwantclones, retrieved 2026-07-05). Drop far-red to zero here; the elongation you wanted earlier is now a liability.
- Ramp DLI to the top of the band over 3–4 days.
- Cut misting frequency as VPD rises.
- Verify: stem holds the plant upright without support.
Environment Coordination
Temperature and Root-Zone Heat
Setpoints only hold if the root zone and the air around the cuttings move together. MSU Extension’s propagation pointers put stage-1 medium temperature at 73-77 °F, and note that rooting is delayed when light is too low and reduced when it is too high (MSU Extension, undated, not re-verified this run). Bottom heat is the usual way to hold that band while air temperature stays lower, which keeps the leaf cool enough to slow transpiration without stalling the root zone. The practical check is a probe in the medium, not a thermostat reading on the wall.
Humidity, VPD, and Airflow
Treat VPD as the control variable and relative humidity as the outcome. Higher light intensity, higher air temperature, and lower RH all raise VPD and dry cuttings faster, so mist intervals shorten as any of the three climbs (GrowerTalks, undated). Airflow belongs in the same calculation: enough movement to refresh the boundary layer, not enough to strip it.
Pro Tip: Drive misting from VPD and tray weight, not from a fixed clock. A clock cannot see a warm afternoon or a dimmed fixture.
Integrating Misting and Airflow Timing
Bright spots in a propagation house dry faster than shaded spots, so an average PPFD reading can hide a tray-level problem (e-GRO, 2025). Walk the tray before trusting the sensor. Where the stage ladder above calls for shorter intervals, the cause is usually evaporative demand rather than a schedule change.
Controls and Standardization
Standardization is what separates a propagation protocol from a habit. The section below covers the three control layers that make a rooting recipe reproducible across rooms, sites, and staff: dimming and spectrum channels, PPFD mapping with DLI logging, and the SOP and audit trail that holds both together.
Dimming and Spectrum Control
Multi-channel dimming is the control requirement that matters most for propagation, because blue, red, and far-red need independent adjustment as cuttings move from callus to toning. Fixtures that expose separate dimming channels, and that can be used to schedule far-red separately from the main photoperiod, let you change one spectral variable without disturbing PPFD. SLTMAKS supports this kind of channel-level control in its propagation-oriented fixtures; the point for evaluation is not the brand but whether the fixture’s control interface lets you log what you set.
Mapping PPFD and Logging DLI
PPFD and DLI for propagation are measured, not assumed. The standard mapping method uses a calibrated quantum or PAR sensor moved across a fixed grid at the actual canopy plane, recording average, minimum, maximum, the min:avg uniformity ratio, and the coefficient of variation (Thrive Agritech, 2026-09-05; Fytech Systems, 2026-06-26). Re-map after any change to fixture height, dimming level, overlap, cleaning, or room layout, since each one moves the numbers.
DLI is logged rather than spot-checked: a quantum sensor plus a data logger or environmental controller records PPFD at intervals and integrates it into a daily total, and continuous logging at roughly ten-minute intervals is described as the most accurate approach because DLI depends on the full day’s integral (Purdue Extension HO-238-W, undated; Photone, 2026-07-21).
Multi-Site SOPs and Audits
An LED propagation room SOP should specify the sensor model and calibration date, the grid pattern and canopy plane, the logging interval, and the acceptance range for uniformity. That record is what an audit asks for: not a claim that the room is uniform, but the map and the log that show it. Where the evidence stops, say so plainly. No independent test data published after 2024 was found for grid density or uniformity-ratio targets in propagation rooms, so set your own acceptance band from your own baseline map rather than quoting a figure.
Compliance, Energy, and ROI
Safety and Certifications
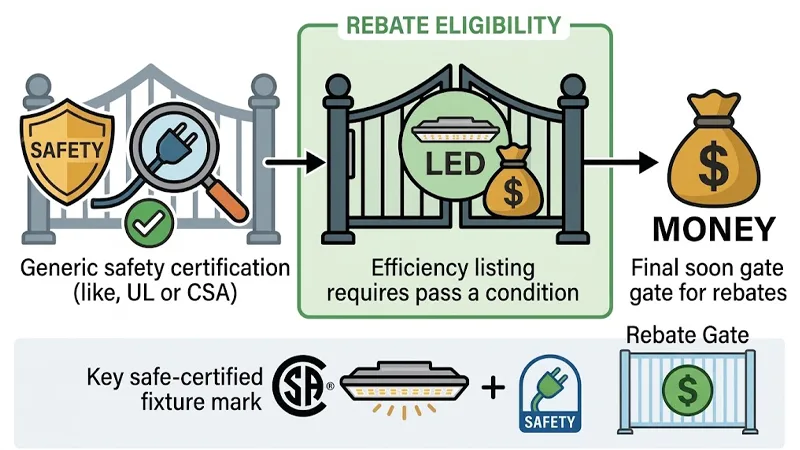
Two separate listings gate a propagation room purchase, and buyers often treat them as one. The first is a safety listing from a certification organization recognized in the US or Canada, which DLC’s safety-certification requirement makes a condition of any product appearing on its list. The second is the efficiency listing itself, and that is where the money sits.
Key Takeaway: DLC listing is the rebate gate; a safety listing is a separate requirement. A fixture can carry a valid safety mark and still be ineligible for a utility rebate.
Energy and HVAC Load Math
Efficiency thresholds moved recently, so older quotes deserve a second look. The DLC HORT V4.0 effective and delisting dates put V4.0 in force on 18 April 2025, with non-compliant V3 products delisted on 5 January 2026. The 2.5 µmol·J⁻¹ PPE threshold and what it delists represent an 8.7% increase over V3.0, more than 45% above the most efficacious non-LED option, a 1000 W DE HPS, and remove roughly 11% of the QPL. Lower fixture watts also cut heat rejected into the propagation room, which reduces HVAC load.
Payback and Rebates
Model payback on the listed fixture, not the quoted one. Confirm the model still appears on the QPL, check the rebate program’s own eligibility rules, and treat any efficiency figure above the threshold as headroom rather than a guarantee.
Conclusion
The stage ladder is the deliverable: a spectral recipe, a PPFD and DLI target, and an environment band for each of the three propagation phases, not one setting held from stick to transplant. Lock those numbers into a written recipe, then validate them against your own room rather than trusting any published table, including the ones here.
Run a simple A/B trial before you commit a whole bay. Split one cultivar across two identical trays, change a single variable (blue to red ratio for clones, or the length of the brief far-red window), and log rooting percentage, days to visible roots, and stem length at transplant. One variable at a time is what makes the result readable.
Document the trial in your LED propagation room SOP: cultivar, date, setpoints, and outcome. That record is what turns a working rooting clone’s LED spectrum into a repeatable process across rooms, sites, and staff changes.
When you are ready to standardize across multiple sites, talk to an SLTMAKS propagation specialist about mapping your rooms and building the SOP template.
FAQ
What is the best LED spectrum for rooting clones?
Red-dominant with a blue complement is the usual starting point, not a blue-heavy recipe. Red supplies most of the photosynthetic drive a cutting can use before it has roots, while blue shapes structure by suppressing stretch. Commercial and academic propagation work treats light quality as a secondary lever: root dry mass is largely unaffected by colour, though some trials show red-leaning light producing more and longer roots. Start with a mixed white-plus-red baseline and treat the exact ratio as something to confirm on your own bench.
What PPFD and DLI do cannabis clones need while rooting?
What PPFD and DLI do cannabis clones need while rooting?
Freshly stuck cuttings do best at low intensity — roughly 50–150 µmol·m⁻²·s⁻¹, with many guides allowing up to 200 µmol·m⁻²·s⁻¹ once the tray is stable. On an 18/6 schedule, that lands around 4–7 mol·m⁻²·d⁻¹ early, rising toward 6–10 as roots form. Too much light is the more common mistake, because high intensity drives transpiration stress in a plant that has no roots to replace lost water.
Should I run far-red light while rooting cuttings?
Only as a short end-of-day dose, and only after the tray holds its starting PPFD band steadily. Far-red works through the phytochrome R: FR ratio: a low ratio signals shade avoidance and elongation, which is exactly what you don’t want before roots show. If internodes lengthen between checks, cut the far-red window rather than adding blue.
Is spectrum or intensity more important for propagation?
Intensity, photoperiod, and VPD move rooting outcomes at least as much as waveband choice at the clone stage. A well-balanced blue-to-red ratio won’t rescue a room with uneven PPFD or drifting VPD, so the practical goal is uniformity — the same ratio and the same delivered light at every tray position. Change one variable at a time and validate it with a small per-cultivar A/B trial before scaling.