Engineer the perfect light spectrum for optimal plant growth. Boost your yields and cultivate year-round with our energy-efficient LED solutions. Tell us your needs for a customized lighting strategy and quote.
If you’ve ever searched for a full spectrum led grow light distance chart, you already know the problem: every grow space is different, but plants still need a “safe” starting point. The goal of this guide is to give you stage-by-stage hanging heights that work in real rooms, while also teaching you how to fine-tune distance using simple light metrics.
Distance is not just about avoiding leaf burn. It’s about delivering the right light intensity and daily dose for each stage, so seedlings don’t stall, vegetative plants don’t stretch, and flowering/fruiting crops don’t plateau.
Table of Contents
Why grow light distance is such a big deal
Light intensity changes quickly when you move a fixture up or down, and plants respond to those changes faster than most growers expect. A small distance change can be the difference between compact healthy growth and stressed, bleached tops.
Distance also controls uniformity across your canopy. Even if your center PPFD looks perfect, the edges might be too weak (causing uneven growth) or too strong (causing edge curl), depending on optics and layout.
Distance controls intensity more than “wattage” does
Wattage tells you what the fixture consumes, not what your plants receive. What matters at leaf level is the photon density reaching the canopy (PPFD), and distance is one of the fastest ways to change it. OSU Extension
Most quality LED manufacturers publish PPFD maps at specific hanging heights, which is the most reliable way to translate “fixture specs” into “plant reality.” If your light has a dimmer, distance becomes even more powerful because you can keep a stable mounting height and tune intensity with the knob.
Too close vs too far: both can ruin results
When a fixture is too close, plants may show scorched or bleached tissue, abnormal coloration, or overly compact growth that slows development. These symptoms are common in indoor setups where intensity ramps too quickly. NDSU
When a fixture is too far, seedlings stretch, internodes lengthen, and plants spend energy “reaching” instead of building roots and leaves. The result is weak structure, slower growth, and uneven canopy development over time.
The 3 lighting numbers you should know before using a distance chart
A distance chart is only useful when it’s tied to light intensity and daily light dose. Once you understand PPFD and DLI, you can make any chart work—even if your fixture brand or room size is different.
PPFD: the intensity at canopy level
PPFD (photosynthetic photon flux density) is the amount of photosynthetically active light that actually hits a surface each second, measured in μmol·m⁻²·s⁻¹. It’s the best single “at this moment” number for deciding whether your light is too strong or too weak at a given distance. OSU Extension
For many indoor production scenarios, a PPFD range around 400–800 μmol·m⁻²·s⁻¹ is commonly discussed as a strong growth zone, but early stages often need less and flowering/fruiting often needs more (especially in high-performance grows). OSU Extension
DLI: the total light your plant receives each day
DLI (daily light integral) is the total amount of photosynthetic light delivered in 24 hours, measured in mol·m⁻²·d⁻¹. It correlates strongly with growth because plants respond to the daily “light budget,” not just the peak intensity. canr.msu.edu
If you push intensity without managing DLI, you can waste energy or stress plants. If you keep intensity modest but extend photoperiod, you can often hit your target DLI more gently and safely. Virginia Tech Publications
Photoperiod: the lever that changes DLI without changing distance
Photoperiod is the number of light hours per day. Because DLI is essentially “PPFD × time,” you can reduce risk by using a longer photoperiod at a lower PPFD in sensitive stages. growertalks.com
This is why two growers can hang the same light at the same distance and still get different results. If one runs 18 hours and the other runs 12, their plants receive very different daily doses.
What “full spectrum” really means for distance
Many growers assume “full spectrum” automatically equals “safe,” but spectrum does not cancel out intensity. Full-spectrum fixtures (often white LEDs with additional diodes) are generally versatile across stages, yet they still must be set to the right PPFD and DLI. University of Minnesota Extension
Full spectrum is about versatility, not immunity to stress
Balanced/white or mixed-spectrum lighting can be suitable for most plants at most stages, which is why full-spectrum LEDs are popular for indoor gardening. University of Minnesota Extension That said, if PPFD is too high at the canopy, you can still bleach leaves and slow growth even with an excellent spectrum.
PAR range still matters for plant growth
Plants primarily use photons in the 400–700 nm range for photosynthesis (commonly discussed as PAR). DLI and PPFD are based on measuring photons in that photosynthetically active region. canr.msu.edu
So when you adjust distance, you’re adjusting how many usable photons reach the plant. That’s the core reason a distance chart works when it is tied back to PPFD/DLI.
Full Spectrum LED Grow Light Distance Chart: safe heights by stage
The chart below is designed as a safe starting point for most indoor grows using modern full-spectrum LEDs. It assumes you will fine-tune by watching plant response and, ideally, by measuring PPFD at canopy level.
Because fixtures vary, the chart is organized by fixture intensity class rather than only by wattage. A high-efficiency 300W bar light can outperform a low-efficiency 600W blurple, so the class approach keeps the guidance practical.
Distance chart (starting points)
How to read it: pick your growth stage, then choose the fixture class that best matches your setup. If you have a dimmer, you can often stay at the “medium” distance and adjust power to hit your target PPFD.
Growth stage
Typical target PPFD (μmol·m⁻²·s⁻¹)
Typical target DLI (mol·m⁻²·d⁻¹)
Low-intensity fixtures (seedling bars, small panels)
Mid-intensity fixtures (most home grow panels/bars)
These PPFD/DLI concepts are widely used in controlled environment production, and extension resources commonly emphasize managing light by intensity and duration rather than guessing from wattage. Yard and Garden
Propagation and young plant stages are often managed with lower DLIs, while finishing stages and high-light crops typically require significantly more daily photons for strong growth. canr.msu.edu
Stage-by-stage guidance (how to use the chart correctly)
A chart alone doesn’t prevent mistakes, because plants in different rooms have different temperatures, reflectivity, airflow, and watering patterns. Use the chart as your initial “safe height,” then adjust with a simple method: set a target PPFD, set a photoperiod, and check plant response weekly.
Seedlings, germination, and clones: keep it gentle and stable
Seedlings and fresh cuttings are sensitive to sudden jumps in intensity, and they don’t have the root capacity to support aggressive light. Many propagation recommendations emphasize managing light by both PPFD and DLI, because rooting and early growth can be delayed under very low daily light. P.L. Light Systems
As a practical approach, target 100–300 PPFD and keep DLI modest in the beginning. If you want faster growth without stress, increase DLI gradually by adding time first, then intensity. canr.msu.edu
Early vegetative: build leaves and roots without stretch
Vegetative growth needs enough intensity to build leaf area and strong stems, but not so much that leaves curl or bleach. Many production guides focus on balancing quality, intensity, and duration, because “more light” is only helpful when the plant can use it. Yard and Garden
If your plants are stretching, increase PPFD by lowering the light slightly or increasing power. If your plants look overly compact with pale new growth, raise the light a bit or reduce intensity.
Late veg and pre-flower: increase intensity, protect uniformity
As plants get larger, canopy uniformity becomes more important than peak center intensity. If your light is too close, the center may be perfect while edges lag, which leads to uneven height and poor airflow.
At this stage, aim for a stronger PPFD while keeping a close eye on leaf temperature and tip health. If you can measure PPFD, adjust distance until your canopy average is in your desired range, then keep that height and use the dimmer to maintain stability.
Flowering and fruiting: intensity matters, but DLI matters more
High-light crops typically need higher daily photon totals for maximum yield. Purdue’s horticulture guidance notes that greenhouse production targets can be around 15–17 mol·m⁻²·d⁻¹ for lettuce and 20–30+ mol·m⁻²·d⁻¹ for tomatoes, illustrating how fruiting crops usually demand more light per day. Purdue Agriculture
If you push flowering intensity too fast, you can cause bleaching and top stress, especially in the first 1–2 weeks after the transition. The safer strategy is to ramp up over 10–14 days while keeping your canopy even and well-ventilated.
Crop-specific “quick targets” (so you can choose the right stage settings)
Stages are useful, but crops differ. If you grow a mix of leafy greens, herbs, and fruiting plants under the same full-spectrum system, you should adjust distance (or dimming zones) based on what you’re actually growing.
Leafy greens and lettuce: moderate DLI with consistent coverage
Lettuce growth is strongly tied to DLI, and research-based discussions often cite around 17 mol·m⁻²·d⁻¹ as an “ideal” target in specific hydroponic greenhouse contexts. HortScience That doesn’t mean you must hit 17 indoors, but it shows why lettuce performance can jump when you move from “dim” to “moderate” lighting.
As a practical indoor goal, many growers do well by aiming for a DLI in the mid-teens and prioritizing uniform coverage. If tip burn appears, reduce intensity slightly and improve airflow rather than immediately raising the light dramatically.
Vegetable transplants and seedlings: DLI often starts lower, then ramps
For vegetable transplant production, 10–12 mol·m⁻²·d⁻¹ is described as “acceptable,” with more light often producing faster growth. Purdue Agriculture That fits well with a gradual ramp strategy where you begin at lower PPFD and increase over time.
If you’re hardening seedlings for outdoor transplanting, reduce photoperiod slightly and avoid dramatic PPFD spikes. This helps seedlings transition without shock while maintaining sturdy structure.
Fruiting crops like tomatoes: higher DLI expectations
Tomatoes are commonly treated as higher-light crops, with commercial targets frequently cited in the 20–30 mol·m⁻²·d⁻¹ range. Purdue Agriculture Indoors, hitting these numbers can require strong fixtures, tight distances, and careful heat/air management.
If your setup cannot reach those DLIs efficiently, focus on canopy uniformity and consistency rather than chasing extreme PPFD. Steady, repeatable light usually beats “too much sometimes, too little other times.”
How to calculate your DLI from PPFD (so distance becomes simple)
Once you can estimate DLI, you can convert your distance chart into a precise plan. This also helps you decide whether to change distance or simply change photoperiod.
The practical formula
DLI (mol·m⁻²·d⁻¹) ≈ PPFD (μmol·m⁻²·s⁻¹) × 3600 × hours ÷ 1,000,000. This relationship is commonly used in horticulture lighting discussions and is frequently presented as the simplest way for indoor growers to connect intensity and duration. growertalks.com
For example, if your canopy PPFD is 300 and you run 16 hours, your DLI is about 17.3. That’s why a “moderate” PPFD can still deliver a strong daily dose if you run longer photoperiods.
A lettuce example (why photoperiod can be your safety tool)
Virginia Tech extension materials show an example where a target DLI for lettuce can be met by operating supplemental lighting for a calculated number of hours per day. Virginia Tech Publications The point is not that every lettuce grow must follow that exact schedule, but that DLI-based thinking turns distance guessing into a controlled plan.
If your seedlings look stressed, you can often keep distance the same and shorten hours for a week. This reduces daily dose without forcing you to constantly re-hang equipment.
How to measure PPFD accurately (and avoid common mistakes)
If you want your full spectrum led grow light distance chart to work reliably, you need at least one trustworthy way to estimate canopy PPFD. You do not have to buy a lab instrument, but you should understand measurement limitations.
Best option: a quantum sensor or DLI meter
Quantum sensors and DLI meters are designed for plant lighting measurement, and manuals often explain that spectral differences between light sources can create measurement errors if not accounted for. apogeeinstruments.com If you’re using a dedicated horticulture sensor, keep it clean, level, and measured at canopy height.
If you measure at multiple canopy points (center and corners), you’ll learn more in five minutes than you will from hours of online distance charts. Uniformity is often the hidden limiter in indoor grows.
Practical option: manufacturer PPFD maps + a simple checklist
If your light came with a PPFD map, use it. Manufacturer maps usually show PPFD at specific heights across a grid, which makes distance decisions much easier.
Then verify with plant response, because reflectivity and tent size change real-world intensity. If you see bleaching at the top but weak growth at the edges, raise the fixture slightly and increase power to improve uniformity.
Troubleshooting: what your plant is telling you about distance
Plants give clear signals when distance is wrong. The key is to interpret those signals correctly, because nutrient issues and watering mistakes can mimic light stress.
Signs your light is too close
Leaves may bleach, scorch, or show abnormal coloration, and plants may become excessively compact. These “too close” symptoms are frequently listed in indoor lighting education materials. NDSU
If you see these signs, raise the fixture 4–8 inches (10–20 cm) and hold changes for several days before adjusting again. Rapid back-and-forth changes can keep plants in a constant stress cycle.
Signs your light is too far
Seedlings stretch, stems thin, and leaf spacing increases. Growth may be slow even if your nutrients are perfect, because the plant simply isn’t receiving enough photons per day.
In that case, lower the light gradually or extend photoperiod until plants build stronger structure. Once plants look compact and sturdy, you can decide whether to increase intensity for faster growth.
When it’s not the light
If you raise intensity but your leaves taco upward, it may be heat or airflow rather than pure PPFD. If your medium is too wet and roots lack oxygen, plants can also react poorly to higher light because they cannot support transpiration.
Use a simple rule: only change one variable at a time (distance, dimming, or photoperiod). This makes troubleshooting faster and prevents “mystery problems.”
Practical ramp schedules (safe, repeatable, and easy to follow)
Most growers get the best results by ramping light, not by jumping from low to high in one day. Ramping protects sensitive tissues and makes your results more consistent from cycle to cycle.
Example ramp for seedlings → veg
Start seedlings at a safe height targeting the lower end of the seedling PPFD range. Keep that stable for several days, then increase DLI by extending photoperiod slightly before you lower distance.
After 7–10 days, lower the fixture in small steps or increase dimmer power until you reach early vegetative targets. This approach fits well with propagation and young plant guidelines that emphasize gradual increases as plants establish. canr.msu.edu
Example ramp for veg → flowering/fruiting
At the transition, keep your veg distance for the first few days and adjust only photoperiod. Then increase intensity over 10–14 days using the dimmer or small distance changes, while watching the top leaves closely.
This avoids the common “first-week bleach” problem where plants suddenly receive a much higher daily dose than they can process. Consistency here usually improves yield quality more than aggressive early intensity.
Safe mounting tips (don’t ignore this part)
Hanging height isn’t only a plant issue—it’s a safety issue. A stable mount keeps your canopy consistent and reduces risk of accidents.
Keep fixtures level and secure
Make sure your fixture is level so your PPFD distribution stays predictable. If one side is lower, you can create uneven growth and “hot spots” that look like nutrient burn.
Use proper ratchets or fixed mounts rated for the fixture weight. A slipping hanger can drop a light overnight and instantly cause burn or physical damage.
Protect your eyes and manage glare
High-output LEDs are bright enough to cause discomfort and temporary vision issues. Wear appropriate eye protection when working under intense fixtures, and avoid staring directly at the diodes.
This becomes even more important when fixtures are mounted close during flowering/fruiting. A safe grow is one you can operate comfortably every day.
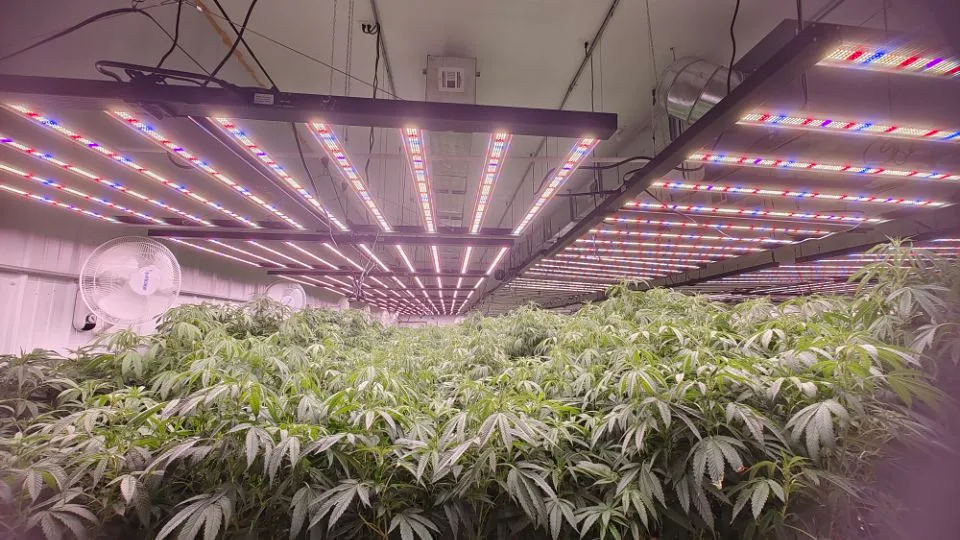
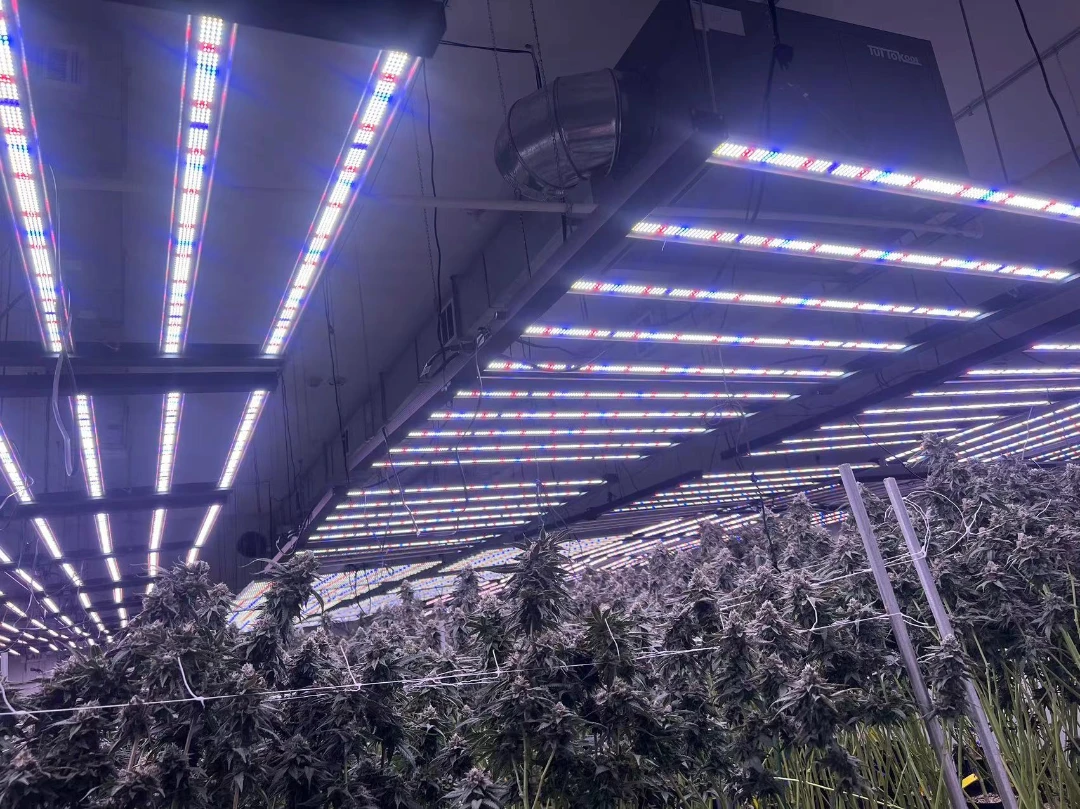
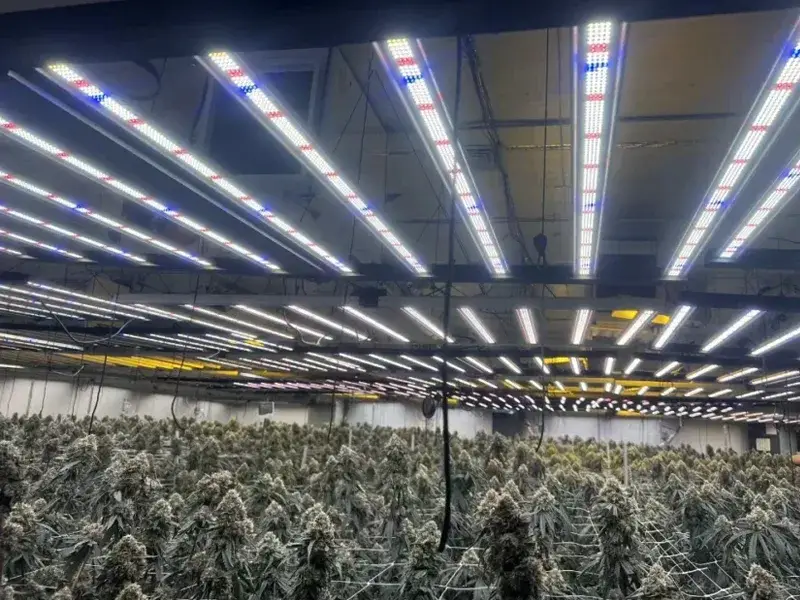
Why SLTMAKS-style full spectrum fixtures help you dial distance faster
A good full-spectrum fixture makes distance control easier because it’s designed for predictable output and stable operation. Even if you switch models or expand your grow, consistent PPFD maps and reliable dimming behavior reduce trial-and-error.
Look for features that simplify distance control
Choose fixtures with smooth dimming, consistent distribution, and clear PPFD guidance. This lets you keep a stable hanging height and fine-tune intensity without constantly reconfiguring your room.
If you’re building a production-focused indoor grow, prioritize uniformity over peak center intensity. Uniform canopies are easier to manage, easier to irrigate, and easier to scale.
FAQ
Is there one perfect distance for a full spectrum LED grow light?
There isn’t one perfect distance because plant stage, photoperiod, and fixture output all change the real intensity at the canopy. A chart gives safe starting heights, but PPFD and DLI are what make the setting correct. Virginia Tech Publications
Should I adjust distance or dimming first?
If you have a dimmer, adjust dimming first while keeping the fixture at a stable, safe height. Distance changes are still useful, but they can change uniformity and canopy coverage patterns, so dimming is often the cleaner adjustment.
How often should I change hanging height?
Weekly adjustments are usually enough for most crops and indoor setups. Plants need time to respond, and constant daily changes often create confusion rather than improvement.