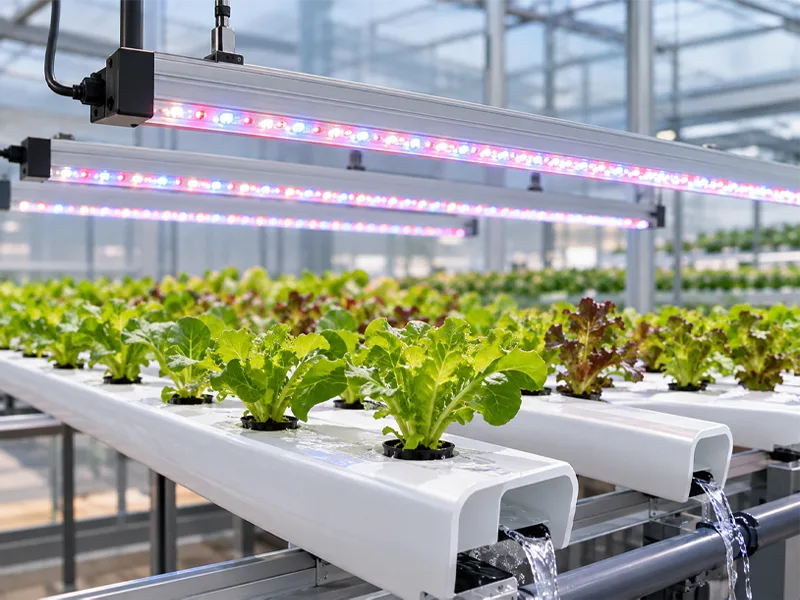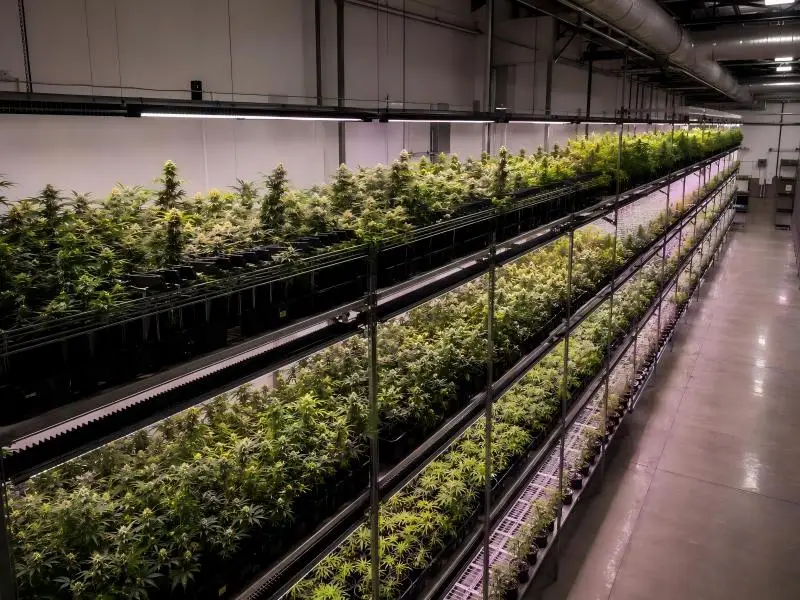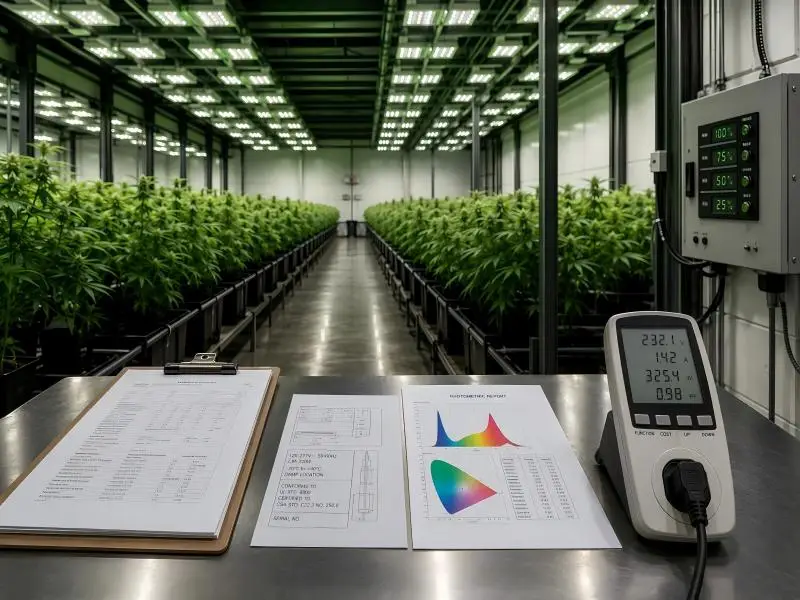
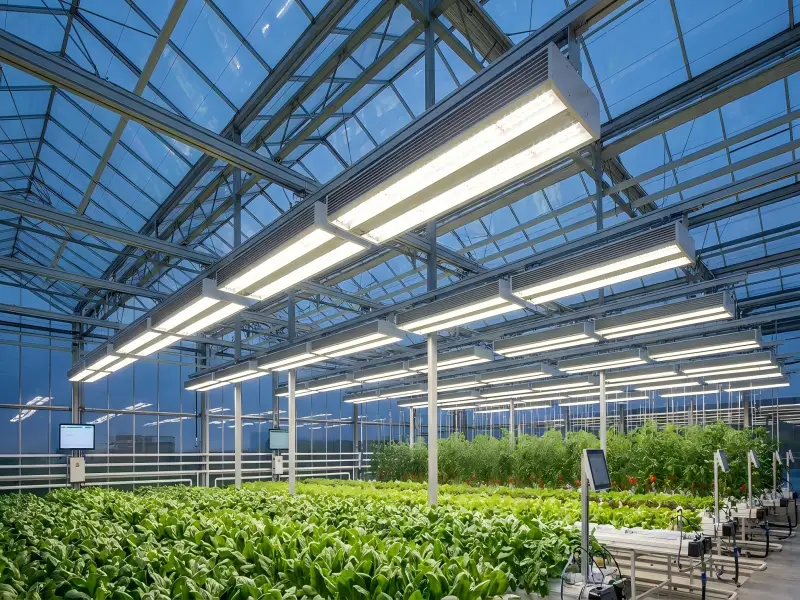
For decades, the 1000-watt Double-Ended (DE) High-Pressure Sodium (HPS) fixture reigned supreme as the industry standard for commercial greenhouse supplemental lighting. However, shifting energy economics, rising electrical utility tariffs, and dramatic advancements in solid-state semiconductor efficiency have fundamentally altered commercial horticulture. Today, commercial facility operators face a clear operational mandate: transition from high-consumption, thermal-heavy HPS fixtures to high-efficacy LED top lighting systems.
Executing a successful retrofit HPS to LED initiative requires far more than unscrewing an old bulb and mounting a new fixture. A commercial greenhouse lighting retrofit is an electrical and environmental system re-engineering project. When executed correctly, upgrading to modern LED top lights cuts lighting power demand by 35% to 45%, doubles overall photon efficacy, dramatically reduces peak summer cooling loads, and preserves or increases target daily light integral (DLI) across every square foot of canopy.
This comprehensive greenhouse lighting retrofit guide breaks down the physics, electrical circuit math, step-by-step installation Standard Operating Procedures (SOPs), microclimate adjustments, and financial ROI models needed to retrofit legacy 1000W HPS infrastructure with modern LED top lights.
The Physics of 1-to-1 HPS Replacement: Matching Photons, Slashing Watts
A frequent misconception among commercial cultivation operators is that replacing a 1000W HPS requires installing a 1000W LED fixture. In reality, evaluating a lighting upgrade based on input electrical wattage is an outdated practice. Horticultural lighting performance is dictated by delivered photon flux—specifically Photosynthetic Photon Flux (PPF, measured in μmol/s) and Photosynthetic Photon Efficacy (PPE, measured in μmol/J).
Photon Efficacy Breakdown: 1.7 µmol/J vs. 2.8+ µmol/J
Legacy 1000W DE HPS systems typically draw approximately 1,050 total system watts when factoring in electronic ballast losses. They generate an initial PPF of 1,800 to 2,100 μmol/s, yielding a photon efficacy of roughly 1.7 to 2.0 μmol/J. Furthermore, HPS lamps suffer rapid light degradation, losing 10% to 15% of their total photon output within 10,000 operating hours.
In contrast, industrial-grade greenhouse LED top lights engineered with premium Samsung and Osram diodes deliver a PPE ranging from 2.8 to 3.5 μmol/J.
| Performance Metric | 1000W DE HPS Fixture | Commercial LED Top Light (e.g., SLTMAKS 600W–720W) | Performance Delta |
|---|---|---|---|
| Total system power draw | ~1,050 W | ~600W – 720W | 31% to 42% energy reduction |
| Photosynthetic photon Flux (PPF) | 1,800 – 2,100 μmol/s | 1,800 – 2,300 μmol/s | Equal or higher canopy PPFD |
| Photon efficacy (PPE) | 1.7 – 2.0 μmol/J | 2.8 – 3.5 μmol/J | 65% to 80% higher efficiency |
| Direct heat radiation | ~3,582 BTU/hr (Infrared) | ~2,047 BTU/hr (Convective) | 43% lower heat load |
| Lumen / Photon degradation | 10–15% loss per 10,000 hrs | <10% loss over 50,000 hrs (L90) | 5x longer service life |
Why a 600W–720W LED Replaces a 1000W DE HPS Fixture
Because modern LED diodes convert electrical energy into usable photosynthetically active radiation (PAR) at nearly double the efficiency of gas-discharge lamps, a high-output 600W to 720W LED top light delivers equivalent or superior canopy PPFD compared to a 1050W HPS system.
By upgrading to a 1000W DE HPS replacement LED grow light, facilities achieve a direct 1:1 HPS to LED grow light upgrade in fixture count while immediately stripping 330 to 450 watts of connected load per light position.
Key takeaway: Do not match HPS to LED watt-for-watt. Match fixtures based on delivered Photosynthetic Photon Flux (PPF) and canopy coverage requirements. Replacing a 1000W HPS with a 600W–720W LED top light maintains target DLI while cutting lighting electricity bills by over 35%.
Pre-Retrofit Electrical Audit & Infrastructure Sizing
Before purchasing hardware or unmounting legacy fixtures, facilities engineers must conduct a rigorous electrical site audit. Because LED drivers exhibit different electrical characteristics than HPS ballasts, verifying existing sub-panel capacity, line voltage, and circuit protection is essential.
Circuit Voltage & Phase Compatibility (277V & 480V 3-Phase Grids)
Most North American commercial greenhouses operate on high-voltage distribution systems, typically 277V single-phase or 480V 3-phase. Operating grow lights at higher voltages reduces line current, minimizes voltage drop over long greenhouse runs, and allows smaller conductor wire gauges.
When selecting replacement luminaires, verify that the internal LED driver features wide-range auto-sensing input capabilities (such as 120V–480V AC). This eliminates the need for costly step-down transformers during a retrofit HPS to LED conversion.
Calculating Continuous Loads and Breaker Capacity (NEC 125% Rule)
Under Article 210.20 of the National Electrical Code (NEC), horticultural lighting is classified as a continuous load (operating for 3 hours or more continuously). Consequently, branch circuit conductors and overcurrent protection devices (circuit breakers) must be sized at 125% of the continuous load, or capped at 80% of total breaker rating.
To calculate line current (I) for a given lighting circuit, use the power formula:
I = P / (V × PF)
Where:
- P = Total connected power (Watts)
- V = Line voltage (Volts)
- PF = Power Factor (typically ≥ 0.95 for quality LED drivers)
Circuit sizing comparison: 20A breaker at 277V AC (continuous limit = 16A)
- Legacy 1000W DE HPS (1,050W total draw, 0.95 PF): I = 1,050 W / (277 V × 0.95) ≈ 3.99 Amps per fixture Maximum HPS fixtures per 20A circuit = 16 A / 3.99 A = 4.01 → 4 fixtures max
- Upgraded 600W LED top light (600W total draw, 0.98 PF): I = 600 W / (277 V × 0.98) ≈ 2.21 Amps per fixture Maximum LED fixtures per 20A circuit = 16 A / 2.21 A = 7.23 → 7 fixtures max
This 75% increase in fixture density per electrical circuit means facility operators can expand supplemental lighting footprint or reduce panel breaker counts without running new main distribution feeders.
Driver Inrush Current and Power Factor Management
While LEDs consume less running power, switching on large banks of LED drivers simultaneously generates a transient inrush current—a microsecond current spike as driver input capacitors charge up. If unmanaged, inrush current can trigger nuisance tripping on fast-acting circuit breakers.
Pro tip: To mitigate inrush current during facility startup, configure smart lighting controllers or automated contactors to stagger circuit turn-on times in sequential zones by 1 to 2 seconds. Ensure all installed drivers maintain a Power Factor (PF) ≥ 0.95 and Total Harmonic Distortion (THD) < 10%.
Step-by-Step Installation SOP: Swapping 1000W HPS for LED Top Lights
To ensure safety, structural integrity, and electrical compliance, follow this structured four-phase conversion procedure when executing a retrofit HPS to LED project.
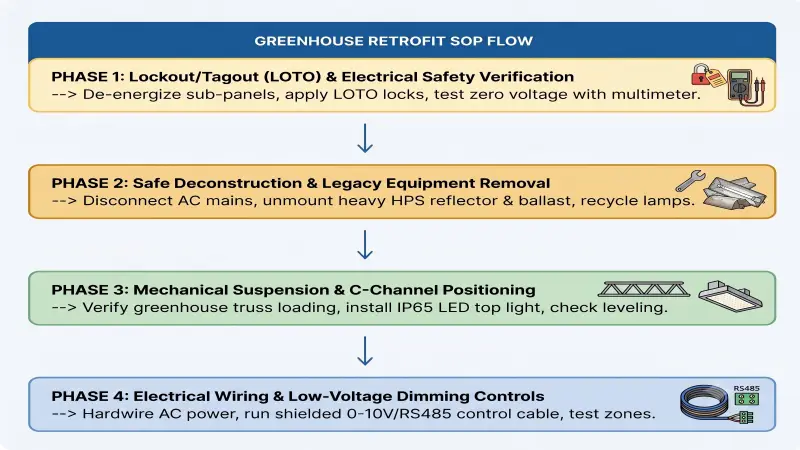
Phase 1: Lockout/Tagout (LOTO) & Safety Verification
- Locate the dedicated lighting distribution sub-panel for the targeted greenhouse bay.
- De-energize the main circuit breaker controlling the branch circuits.
- Apply standard OSHA Lockout/Tagout (LOTO) padlocks and warning tags to the breaker handle.
- Using a calibrated digital multimeter or non-contact voltage tester, verify zero voltage at the fixture junction box or quick-disconnect receptacle before touching any wiring.
⚠️ Safety Note: High-pressure sodium ballasts contain internal capacitors that store high voltage even after power is disconnected. Allow legacy HPS fixtures to cool and discharge for at least 15 minutes before handling.
Phase 2: Removing Legacy HPS Fixtures & Ballasts
- Carefully remove the 1000W DE HPS lamp bulb using protective gloves to prevent oils from contaminating glass tubes. Store spent lamps in hazardous waste containers for proper mercury recycling.
- Disconnect the AC power cord or unwire line voltage from the ballast junction box.
- Unbolt or unhook the heavy HPS reflector and ballast assembly from the overhead structural truss. Use a mechanical lift or scissor lift platform to lower the heavy fixtures safely.
Phase 3: Mounting Mechanical Suspensions & C-Channel Alignment
- Inspect the greenhouse overhead structural trusses, unistrut, or C-channels for load capacity. Modern LED top lights feature lightweight aluminum passive heat sinks that distribute weight evenly across the structure.
- Secure heavy-duty stainless steel mounting brackets or chain suspensions to the truss.
- Raise the LED top light fixture into place and snap or bolt it firmly onto the mounting brackets. Use a spirit level to ensure the fixture is perfectly horizontal, preventing uneven PPFD light spillage along row edges.
Phase 4: AC Power Wiring & Low-Voltage Dimming Controls (0-10V/RS485)
- Connect the AC power cable to the fixture’s IP65 waterproof quick-connector or junction box. Ensure proper grounding (green/yellow ground conductor connected to main ground bus).
- If installing dimmable LED top lights, route low-voltage 0-10V or RS485 control wiring between fixtures in a daisy-chain topology.
- Control Line Isolation: Always route low-voltage control lines at least 12 inches away from high-voltage AC conductors, or run them in grounded metallic conduit to prevent Electromagnetic Interference (EMI) signal noise and potential light flickering.
- Remove LOTO locks, energize the circuit breaker, and perform PPFD commissioning using a quantum PAR meter at canopy height.
Managing the Microclimate Shift: VPD, HVAC, and Heating Adjustments
One of the most profound operational changes when retrofitting from HPS to LED top lights is the shift in greenhouse thermal dynamics. Understanding and managing this microclimate shift is crucial for preserving crop transpiration and target Vapor Pressure Deficit (VPD).
Compensating for Reduced HPS Radiant Infrared Heat
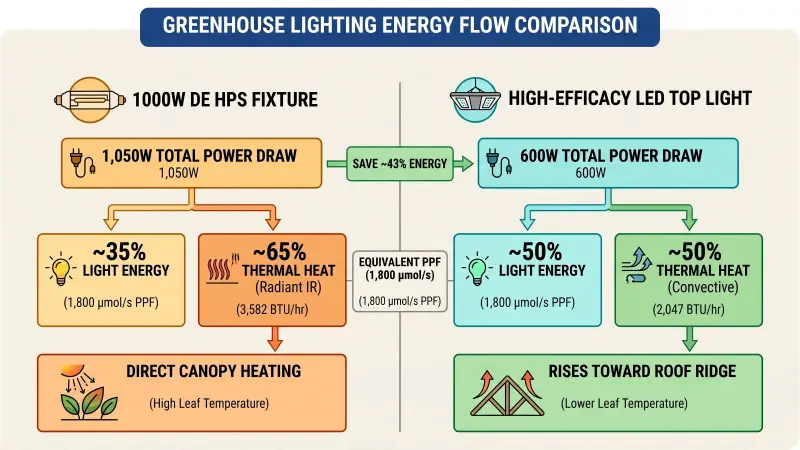
High-Pressure Sodium fixtures convert roughly 65% of their electrical input into radiant infrared (IR) heat directed downward onto plant leaves. This radiant heat artificially warms the leaf surface temperature (Tleaf) by 1.5°C to 3.0°C above ambient room air temperature.
LED fixtures, conversely, emit very little radiant IR heat toward the crop. Instead, heat generated by LED diodes is conducted upward through aluminum heat sinks and dissipated into the upper greenhouse ridge via convection.
To quantify the thermal reduction per fixture, apply the thermal energy conversion formula:
Qthermal = 3.412 × Winput (BTU/hr)
- 1000W DE HPS (1,050W input): 1,050 × 3.412 = 3,582.6 BTU/hr
- 600W LED Top Light (600W input): 600 × 3.412 = 2,047.2BTU/hr
- Thermal Reduction Per Fixture: 1,535.4 BTU/hr heat savings (42.8% reduction)
In summer and shoulder seasons, this heat reduction provides massive operational relief, reducing cooling fan run-times, evaporative pad water consumption, and mechanical HVAC chiller loads.
Optimizing Root-Zone Heating & Relative Humidity (RH) Control
During cold winter cultivation, removing HPS radiant heat means $T_{\text{leaf}}$ may drop closer to ambient air temperature. If unadjusted, lower leaf temperatures reduce crop transpiration rates, slowing nutrient uptake (particularly calcium and magnesium).
To optimize plant performance after an LED retrofit:
- Increase ambient setpoints: Raise daytime ambient greenhouse air temperature setpoints by 1.0°C to 2.0°C to maintain optimal leaf-to-air VPD.
- Utilize root-zone heating: Supply hydronic under-bench or floor heating pipe loops to maintain root-zone temperature at 20°C to 22°C.
- Adjust dehumidification strategy: Because cooler air holds less moisture, relative humidity (RH) can rise quickly at lights-off. Ensure automated dehumidifiers or ridge ventilation purge cycles engage promptly during light transitions.
For a deeper dive into financial and agronomic comparisons between lighting technologies, read our detailed analysis on LED vs HPS commercial greenhouse economics.
Financial ROI & Utility Rebate Optimization
A retrofit HPS to LED project represents a capital expenditure (CapEx) that delivers compounding operating expense (OpEx) savings over a 10 to 15-year operational lifecycle.
Calculating Annual kWh Energy Savings and Demand Charge Reduction
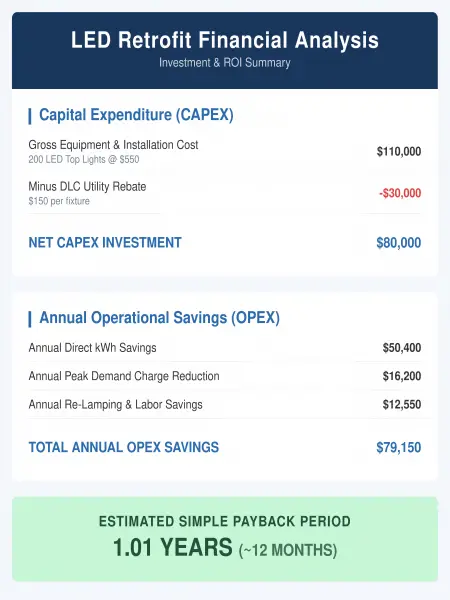
Consider a 10,000 sq. ft. commercial greenhouse operating 200 legacy 1000W DE HPS fixtures for 4,000 supplemental lighting hours per year at an average commercial electricity rate of 0.14 per kWh.
1. Direct kWh energy savings calculation
- Legacy HPS annual energy consumption: 200 fixtures × 1.05 kW × 4,000 hours = 840,000 kWh/yr Annual HPS Electricity Cost = 840,000 kWh × $0.14 = $117,600 per year
- Upgraded 600W LED top light consumption: 200 fixtures × 0.60 kW × 4,000 hours = 480,000 kWh/yr Annual LED Electricity Cost = 480,000 kWh × $0.14 = $67,200 per year
- Direct annual electrical savings: $117,600 – $67,200 = $50,400 saved per year (42.8% reduction)
2. Peak demand charge reduction
Commercial electrical bills include monthly peak demand charges (billed in $$/\text{kW}$). Reducing total connected lighting load by 90 kW (200 × 0.45 kW) at a typical demand rate of $15/kW-month delivers additional savings:
90 kW × $15/kW-month × 12 months = $16,200 in annual demand charge savings
Qualifying for DLC Premium V4.0 Utility Rebates
In North America, electrical utilities offer massive cash rebates to offset CapEx costs for commercial lighting upgrades. To qualify for prescriptive or custom rebate incentives, installed LED fixtures must be listed on the DesignLights Consortium (DLC) Qualified Products List (QPL).
Under the latest DLC V4.0 horticultural efficacy standards, qualified LED top lights must demonstrate:
- Photosynthetic Photon Efficacy (PPE) ≥ 2.50 μmol/J)
- Power Factor (PF) ≥ 0.90
- L90 flux maintenance > 36,000 hours
- IP65 ingress protection rating for humid agricultural environments
Depending on the utility provider, DLC Premium qualified fixtures can receive cash rebates ranging from 100 to 250 per fixture, covering up to 50% of total project equipment costs.
Quantifying Labor & Maintenance Savings (Zero Re-Lamping)
HPS lamps require complete bulb replacement every 12 to 18 months to compensate for severe photon decay. Re-lamping a 200-fixture greenhouse requires 200 × $50 per bulb = $10,000 in hardware costs alone, plus lift rental and electrician labor (~30 hours × $85/hr = $2,550).
Over a 5-year operating window, eliminating HPS bulb replacements saves over $62,750 in maintenance labor and materials.
Simple payback period summary (200-fixture greenhouse retrofit)
To explore specialized lighting schedules and sunlight compensation strategies for greenhouse production, consult our greenhouse LED supplemental lighting guide.
FAQ
Can I install LED top lights directly into my existing HPS ballasts?
No. High-Pressure Sodium ballasts supply high starter ignition voltages and inductive power regulations designed specifically for high-intensity discharge gas lamps. LED fixtures operate on constant current DC power supplied by internal or external LED drivers. When retrofitting, the legacy HPS ballast must be completely bypassed or removed, and AC line voltage connected directly to the LED driver.
Will changing from HPS to LED reduce my greenhouse yield during winter?
No—provided canopy PPFD and daily light integral (DLI) are maintained and leaf temperature is properly managed. Because LED top lights deliver a broader, more uniform light spectrum (including deep red 660nm and far-red 730nm wavelengths), crops benefit from higher photosynthetic utilization. Adjusting ambient heating setpoints by 1°C to 2°C ensures winter yields match or surpass HPS benchmarks.
What is the optimal hanging height for LED top lights in a commercial greenhouse?
Due to wide beam angles (120° optical distribution) and multi-bar or compact top-light optics, high-output greenhouse LED top lights are typically mounted 4 to 8 feet above the crop canopy. This mounting height ensures uniform light blending without blocking natural sunlight during non-supplemental hours.
Should I choose 0-10V or RS485 dimming controls for my retrofit?
For small facilities (<50 lights), standard 0-10V analog dimming is simple and effective. For large commercial greenhouses with multiple automated zones, RS485 or digital protocol networks are recommended. Digital control networks allow individual fixture addressing, dynamic PAR sensor feedback integration, and seamless interface with central climate management computers.
How do LED top lights affect greenhouse pest and disease management?
Transitioning to LED top lights helps reduce pest and disease pressure in two key ways. First, LEDs eliminate the high radiant heat spikes associated with HPS fixtures, preventing rapid humidity fluctuations that promote fungal pathogens like powdery mildew and Botrytis. Second, unlike HPS lamps, LEDs emit virtually no radiant infrared (IR) light and can be spectrally tuned to avoid attracting night-flying pests, leading to cleaner canopy environments and reduced pesticide application requirements.
What utility documentation is required to claim DLC Premium LED rebates?
Proof of purchase (itemized equipment invoices showing model numbers matching the DesignLights Consortium QPL).
Existing facility electrical baseline specs (1000W HPS fixture counts and operating schedule).
Photometric light plan layout demonstrating canopy target PPFD compliance.
Complete utility rebate application forms prior to or immediately following installation.
Upgrading Your Greenhouse Infrastructure with SLTMAKS LED Top Lights
Retrofitting legacy 1000W HPS lighting with modern LED top lights is one of the single most impactful capital investments a commercial greenhouse operator can make. By slashing energy consumption by over 35%, eliminating annual bulb maintenance, and unlocking substantial utility rebates, high-efficacy LED top lights deliver compelling long-term competitive advantages.
At SLTMAKS, we engineer industrial-grade, DLC-listed commercial LED grow lights designed specifically for harsh greenhouse environments. Featuring broad-spectrum Samsung diode arrays, heavy-duty IP65 waterproof aluminum housings, and auto-sensing 120V–480V drivers, SLTMAKS luminaires offer seamless 1:1 replacement for legacy 1000W HPS systems.
To integrate automated light intensity throttling with your central climate computer, review our guide on commercial greenhouse smart lighting controls.
Ready to calculate your facility’s energy savings and rebate potential? Contact the engineering team at SLTMAKS today to request a complimentary light plan simulation and custom ROI project evaluation for your commercial greenhouse.