Starting seeds indoors is one of the fastest ways to level up your garden, greenhouse bench, or small commercial propagation rack. The secret isn’t “more light at all costs”—it’s the right dose of light delivered consistently, so seedlings stay compact, root well, and transition outdoors (or into the next growth stage) without stress.
In this guide, we’ll break down how to use LED grow lights for seedlings in a simple, repeatable way. You’ll learn the key lighting terms (without the headache), practical targets you can actually hit at home or in production, and the fixture features that matter most for safe, efficient seedling success.
Table of Contents
Why Seedlings Need “Gentle” Light (and What Happens If They Don’t)

Seedlings are built for consistency, not extremes
A seedling begins life with limited energy reserves, thin tissues, and a small root system. That’s why early lighting should be steady and “gentle”—not weak, but not so intense that it outpaces the seedling’s ability to drink and cool itself.
In practical terms, your goal is to supply enough light to prevent stretching and support photosynthesis, while keeping temperature and moisture stable. When light, heat, airflow, and watering are balanced, seedlings develop thick stems and dense roots that transplant easily.
The #1 symptom of insufficient light: “leggy” growth
If your seedlings look tall, thin, and floppy, that’s nearly always a light problem. They’re literally reaching for more photons, investing in stem length instead of leaf and root mass. University and extension resources consistently emphasize that strong seedlings come from adequate light intensity and proper placement above the canopy.
The fix usually isn’t complicated: bring the light closer (or increase intensity), improve uniform coverage, and keep the photoperiod consistent.
Too much light can also slow you down
While under-lighting is more common, over-lighting is real, especially with powerful LEDs placed too close. Excess light can cause leaf bleaching, cupping, crisp edges, or stalled growth if water uptake can’t keep pace. Seedlings don’t need “full blast”; they need the correct daily light dose for their stage.
That’s why understanding light “dose” (DLI) and intensity (PPFD) matters more than chasing wattage claims.
The Three Numbers That Matter: PAR, PPFD, and DLI
PAR: the photosynthesis “usable” waveband
Most seedling lighting guidance focuses on photosynthetically active radiation (PAR)—light in roughly the 400–700 nm range that drives photosynthesis.
If you want a deeper explanation of PAR and how it relates to plant growth metrics, the Purdue Extension DLI publication is a solid reference.
PPFD: how intense the light is right now
PPFD (photosynthetic photon flux density) is the intensity at the plant canopy at a given moment, measured in µmol/m²/s. PPFD changes dramatically with distance, fixture optics, and spread pattern, which is why two “same wattage” lights can perform very differently over a seedling tray.
PPFD is the number you adjust when you raise/lower a fixture or dim it. If seedlings stretch, PPFD is usually too low at the canopy level.
DLI: the daily “dose” that predicts growth quality
DLI (daily light integral) is the total amount of PAR delivered over 24 hours, measured in mol/m²/day. DLI is often the most useful concept for seedlings because it combines intensity and photoperiod into one practical target. Michigan State University explains DLI as the daily total of photons that plants receive for growth.
If you want a clear step-by-step way to calculate and use DLI (including examples), Virginia Tech’s extension guide is excellent.
For a straightforward conversion walkthrough from PPFD to DLI, Apogee Instruments has a helpful explainer as well: Daily Light Integral: Measuring Light for Plants.
Practical Targets for LED Grow Lights for Seedlings
A simple DLI range that works for most seedlings
Different crops vary, but a dependable framework is to aim for moderate DLI during propagation—enough for compact growth without wasting energy. Purdue Extension provides useful categories (low, medium, high light) that help you think in terms of DLI goals rather than guessing from watts.
For vegetable transplants specifically, e-GRO (a university-backed greenhouse training network) summarizes the benefits of keeping vegetable transplant DLI in an “optimal” range (often cited around 10–15 mol·m⁻²·d⁻¹) for compact, vigorous transplants.
These numbers are not a rule for every species, but they’re a strong starting point. If your seedlings are shade-tolerant herbs or ornamentals, you may stay lower; if you’re pushing tomatoes and brassicas fast, you may target the higher end while watching temperature and moisture.
Photoperiod: most seedlings do well with 14–18 hours
Most indoor seed-starting setups rely on a longer day length to accumulate DLI without cranking intensity too high. Multiple extension sources commonly recommend about 14–16 hours for typical indoor seed starting (and some guidance goes up to 16–18 hours depending on species and setup).
A practical approach is to choose a consistent schedule (for example, 16 hours on / 8 hours off) and then adjust intensity or distance to hit your target DLI. The “off” period matters because plants use darkness for key metabolic processes.
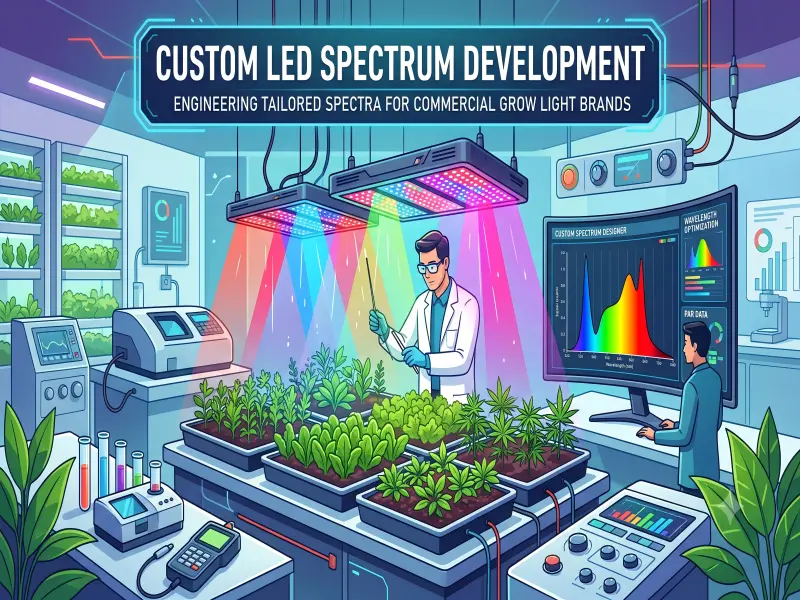
Spectrum: keep it balanced for natural, sturdy growth
For seedlings, a balanced “full spectrum” (white) LED is usually the easiest path to strong morphology and natural-looking plants. You don’t need extreme “blurple” spectra to get excellent results, and a balanced spectrum also makes visual scouting easier (color, nutrient issues, disease symptoms).
If you’re optimizing, blue light tends to support compact growth and leaf development, while red light supports efficient photosynthesis and biomass. Most modern white horticultural LEDs already blend these well for propagation.
Set Up That Works in Real Life (Home Racks to Commercial Benches)

Distance and uniformity matter more than “watts.”
A frequent mistake is using a good light but placing it too far away. Light intensity drops quickly with distance, so you want adjustable hanging or shelf heights and a consistent canopy-to-light gap as plants grow.
If you’re using a strong LED fixture, start higher and lower it gradually while watching leaf response. If you’re using lighter-duty bars, you’ll often keep them closer—especially to prevent stretch—while ensuring you’re not overheating the canopy.
Coverage over each tray is the hidden seedling quality driver
Seedlings under the center of a fixture often look great, while edge cells stretch. That’s a coverage problem, not a “seed quality” problem. Use fixtures sized to your shelf/tray footprint, keep trays centered under the footprint, and consider reflective side panels to reduce edge losses.
If you run multiple trays, prioritize uniformity over peak intensity. Uniform seedlings transplant faster, reduce culls, and simplify scheduling.
Airflow + lighting = stronger stems and fewer disease issues
LEDs run cooler than many older technologies, but seedlings still benefit from gentle airflow. Moving air reduces stagnant humidity at the soil surface and helps stems thicken through mild mechanical stimulation.
Good airflow also reduces the risk of damping-off conditions. Think of it as completing the “strong start” system: light drives growth, airflow keeps the environment honest.
Timers make seedling quality repeatable
A timer turns skill into a process. Use a reliable timer (or smart plug) so your photoperiod never drifts, especially if you manage multiple racks or a propagation room.
Consistency is the reason commercial transplant producers can hit uniform size windows. A simple timer is often more valuable than an extra 50 watts of light.
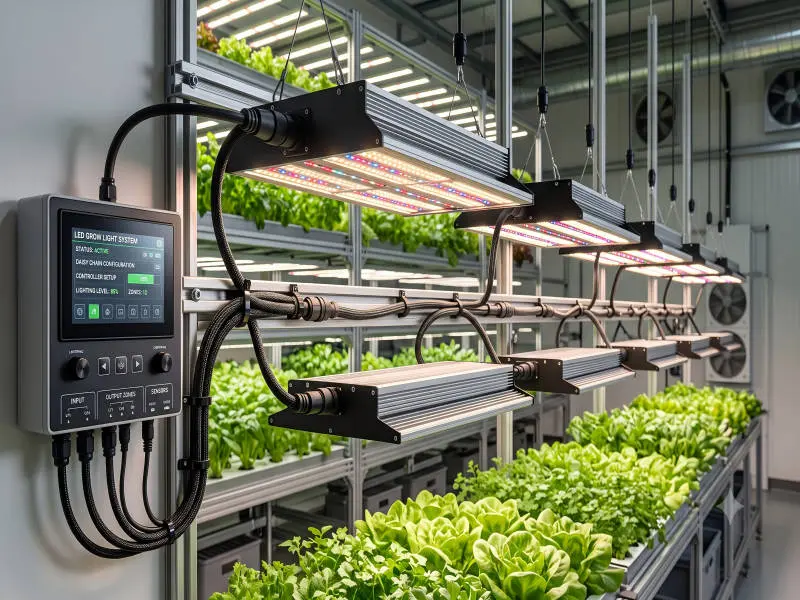
Choosing the Right LED Fixture for Seedlings
Look for efficiency and usable output, not hype
For seedling work, you want a fixture that can deliver your target DLI efficiently across your tray area. Many professional buyers look at photon-based metrics and verified performance rather than marketing wattage.
If you’re comparing horticultural fixtures, organizations like the DesignLights Consortium publish technical requirements for horticultural lighting qualification—useful for understanding what gets tested and how performance is reported.
Dimming is not optional for a serious seedling setup
Seedlings at day 3 do not need the same intensity as seedlings at day 18. A dimmer lets you keep the same hanging height and simply adjust intensity as leaf area expands.
This also helps with energy control. Instead of running overpowered light and “raising it way up,” dimming keeps the spectrum and distribution consistent while tuning PPFD.
Safety and compliance: don’t ignore it
Seed-starting often happens in damp environments—trays, mist, humid tents, greenhouses—so safety matters. UL notes that horticultural luminaires and grow systems pose unique safety issues, and UL 8800 is a standard designed around horticultural lighting equipment and systems.
If you’re buying for a facility (or selling into one), safety marks, proper drivers, and protected connectors aren’t “extras”—they’re risk control.
Troubleshooting: Fix Common Seedling Problems Fast
Leggy seedlings (stretching)
Leggy growth usually means PPFD at the canopy level is too low, or the light is too far away. Increase intensity, reduce distance, and make sure the full tray area is evenly lit.
Also, confirm you’re not running a very short photoperiod. Many extension guides recommend using a timer to keep seedlings under a consistent long day for indoor seed starting.
Pale seedlings or slow growth
Pale, slow seedlings can come from insufficient DLI, cool root zone temperatures, or overwatering that limits oxygen to roots. Increase total light dose gradually, ensure good airflow, and allow the media surface to dry slightly between waterings (while keeping roots moist).
If you are relying on window light plus weak supplemental LEDs, your DLI may be far below what seedlings need. Tracking DLI is the fastest way to stop guessing. AgriCollege
Leaf curl, bleaching, or “crispy” edges
These are common signs of too much intensity at too close a distance, or environmental stress (high VPD, dry airflow, inconsistent watering). Raise the fixture or dim it, then stabilize watering and airflow.
If only the tops are affected while lower leaves look fine, that’s another hint the canopy is getting more PPFD than the plant can use right now.
Damping-off and weak stems
Damping-off is usually an environmental issue, not a light brand issue. Improve airflow, avoid constantly saturated media, and keep the canopy from staying wet for long periods.
Strong, steady light helps because it drives faster, sturdier growth, but it must be paired with airflow and watering discipline to reduce losses.
From Seedling to Transplant: Increase Light Without Shock

Step up the dose as true leaves develop
As seedlings build leaf area and roots, they can use more light effectively. A smooth approach is to increase DLI in small increments every few days rather than jumping from “dim” to “max.”
Virginia Tech’s DLI guide includes practical examples of adjusting operating hours and intensity to hit a desired DLI.
Hardening off is a lighting strategy, too
Outdoor sun can deliver far more light than indoor LEDs, so hardening off is partly about light adaptation. Start with short outdoor exposures in sheltered conditions, then increase duration and sun intensity gradually over several days.
If you skip this step, seedlings may scorch even if they were “healthy” indoors. Indoors, you controlled the dose; outdoors, the dose changes hour by hour.
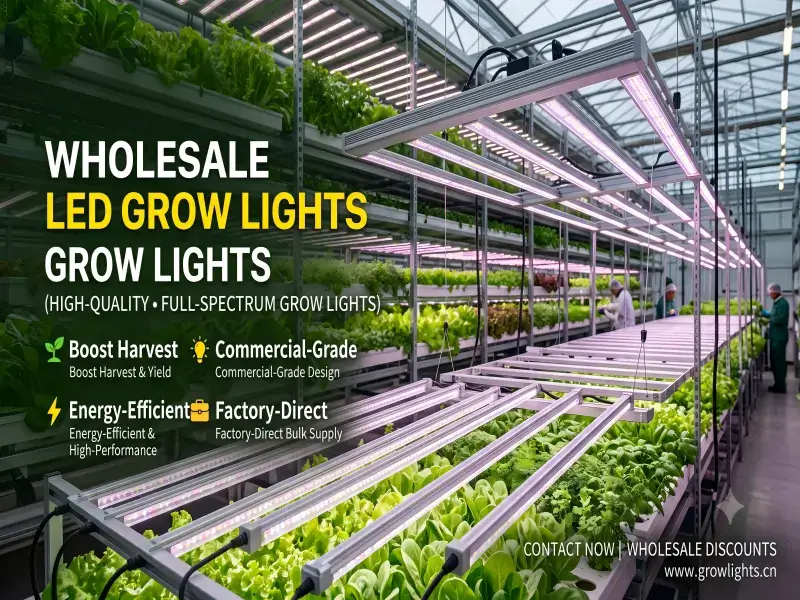
Why Choose SLTMAKS LED Grow Lights for Seedlings
At SLTMAKS, we design LED grow lights for seedlings with one priority: repeatable, uniform propagation results. Seedlings don’t need hype—they need a stable spectrum, even coverage across trays, and practical control (like dimming and reliable drivers) that makes strong starts easy at any scale.
Whether you’re building a home seed-starting rack or equipping a larger propagation area, our team can help you match fixture type, coverage, and control strategy to your tray layout and production goals. When you’re ready to move from “guessing” to a measured light plan, reach out, and we’ll help you set targets that produce stocky stems, strong roots, and smoother transplant cycles.
FAQ
What type of light do seedlings need?
Seedlings need gentle and consistent light for healthy growth. This means not too much light, which can make them stretch, and not too little, which can cause them to become weak. The right light helps them develop strong roots and stems, so they can grow well when moved outdoors.
How can I tell if my seedlings are getting enough light?
If your seedlings look tall, thin, or floppy, they might not be getting enough light. They’re reaching for more light, which makes them stretch. You can fix this by moving the light closer or adjusting it to a higher intensity. Keeping the light height consistent while they grow is also important.
What does DLI mean, and why is it important?
DLI stands for Daily Light Integral. It measures how much usable light your seedlings get each day. This is important because seedlings need a specific amount of light to grow strong. It’s a good idea to aim for a DLI of about 10-15 moles for healthy vegetable seedlings.
How long should my lights be on each day?
A good schedule for your seedling lights is about 14 to 18 hours each day. This gives them time to absorb light without becoming too stressed. You can set a timer to make sure the lights turn on and off at the same time every day.
What kind of LED fixture should I use for seedlings?
Look for LED fixtures that provide full-spectrum light and can be dimmed as your seedlings grow. Fixtures that are designed for seedlings will ensure even light distribution and help prevent stretching while promoting healthy growth.
Why is airflow important for seedlings?
Airflow helps your seedlings stay strong and healthy by preventing too much humidity and keeping the stems sturdy. Gentle air movement can encourage thicker stems and reduce the risk of diseases that can affect young plants.
How do I know if my seedlings are too close to the light?
If your seedlings have curling leaves, light bleaching, or crispy edges, they might be too close to the light or getting too much intensity. In such cases, it’s good to raise the light higher or lower the brightness.
What does it mean if my seedlings have weak stems?
Weak stems often indicate that the seedlings are not getting the right conditions, like enough light or proper airflow. Improving airflow and making sure they receive steady light can help the seedlings grow stronger.
How can I prepare my seedlings for transplanting outdoors?
To prepare seedlings for outdoor transplanting, gradually increase their exposure to sunlight. Start with short periods outside and slowly extend the time. This process is called hardening off and helps them adapt to the more intense outdoor light.
Why should I choose SLTMAKS LED grow lights?
SLTMAKS LED grow lights are designed specifically for seedlings to provide reliable and consistent results. They offer a balanced light spectrum, even coverage for trays, and features like dimming that help promote healthy seedling growth from start to finish.