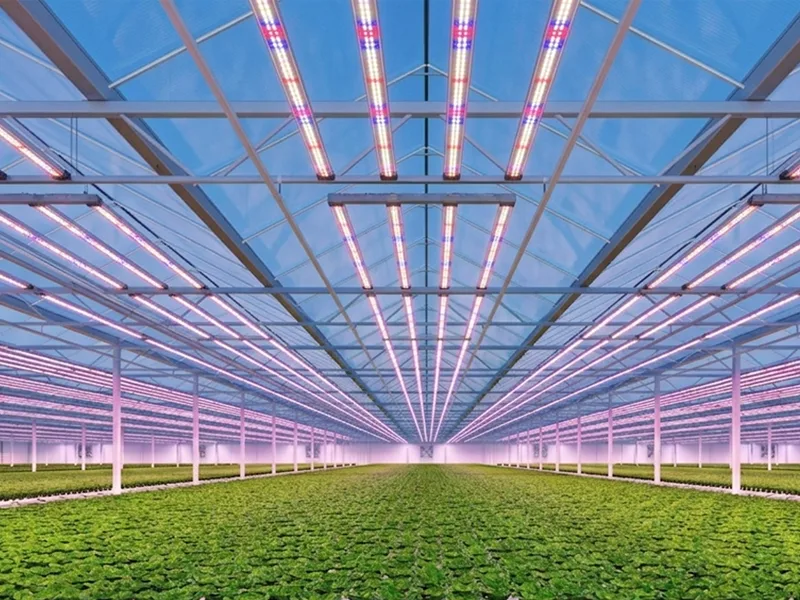
Engineer the perfect light spectrum for optimal plant growth. Boost your yields and cultivate year-round with our energy-efficient LED solutions. Tell us your needs for a customized lighting strategy and quote.
The landscape of commercial agriculture is undergoing a fundamental technological shift. For decades, High-Pressure Sodium (HPS) fixtures have been the undisputed champions of greenhouse lighting, providing the intense photon output necessary for year-round cultivation. However, the commercial horticulture industry is now facing a dual crisis: skyrocketing global energy costs and the increasing mandate for sustainable, low-carbon agricultural practices.
Transitioning from legacy HPS systems to modern commercial LED grow lights is no longer just a futuristic concept; it is a financial and operational imperative. Yet an HPS-to-LED retrofit is rarely a simple “plug-and-play” endeavor. It requires a fundamental recalculation of your facility’s electrical infrastructure, thermal management, and plant canopy strategies.
This comprehensive guide is designed for commercial growers, facility directors, and greenhouse engineers. We will guide you through the entire lifecycle of a lighting upgrade—from calculating the initial business case and auditing your electrical panels, to executing the physical wiring, navigating installation challenges, and troubleshooting post-installation issues. By the end of this guide, you will understand exactly what it takes to implement state-of-the-art greenhouse lighting solutions that maximize yield, optimize energy consumption, and secure your competitive edge in the market.
Table of Contents
The Business Case for Upgrading Your Greenhouse Lighting
Before stripping a single wire or removing an old fixture, it is crucial to understand the economic and agronomic mechanics driving the adoption of LED technology. Upgrading is a significant capital expenditure (CapEx), but the long-term operational expenditure (OpEx) reductions are profound.
Energy Efficiency and HVAC Savings
The most immediate and quantifiable benefit of replacing HPS with LED is the drastic reduction in energy consumption. A standard 1000W HPS fixture actually draws around 1050W to 1100W at the wall due to inefficiencies in the ballast. In contrast, a modern 600W to 700W commercial LED can deliver the equivalent of, or more than, the Photosynthetic Photon Flux (PPF), immediately slashing lighting electricity usage by 30% to 40%.
However, the true financial advantage lies in HVAC savings. HPS lamps generate a massive amount of radiant heat (infrared radiation). A 1000W HPS light produces roughly 3,400 BTUs of heat per hour, much of which is directed straight down onto the plant canopy. This forces commercial greenhouses to run energy-intensive cooling and ventilation systems constantly. LEDs operate fundamentally differently; they emit very little forward radiant heat. The heat generated by LEDs is convective and is managed by heat sinks on the back of the fixture. By eliminating the infrared heat load of HPS, growers can significantly reduce their HVAC sizing and daily cooling costs, making the entire operation more sustainable.
Spectrum Optimization for Commercial Yields
HPS lights produce a fixed, predominantly yellow/red spectrum. While effective for flowering, it is a blunt instrument. Advanced commercial horticulture lighting utilizes precisely engineered, full-spectrum diode arrays.
By incorporating specific ratios of blue, green, red, and far-red wavelengths, LED fixtures can steer plant morphology. Higher blue fractions can keep plants compact and reduce internodal stretching during the vegetative stage, while tailored red spectrums optimize photosynthesis and drive robust flower and fruit development. This level of spectrum control allows commercial growers to increase the production of secondary metabolites—such as terpenes in medicinal plants, or sugars and vitamins in vine crops—directly enhancing the market value of the yield.
Calculating the ROI of an HPS to LED Retrofit
When calculating your Return on Investment, you must factor in more than just the monthly utility bill. A complete ROI model should include:
Direct Energy Reductions: The kilowatt-hour (kWh) difference between the old HPS wattage and the new LED wattage, multiplied by your local energy rate and daily run hours.
HVAC Load Reduction: The savings from decreased cooling requirements.
Maintenance Savings: HPS bulbs degrade rapidly and require replacement every 10,000 to 12,000 hours (roughly every 12-18 months in a commercial setting), plus the labor to replace them. Quality LEDs boast lifespans of 50,000 to L90 (maintaining 90% of original output after 50,000 hours), eliminating routine bulb replacements.
Utility Rebates: Many local governments and utility providers offer substantial cash rebates for retrofitting inefficient HPS systems with DLC-listed (DesignLights Consortium) LED fixtures.
Yield Increases: The revenue generated from heavier, higher-quality harvests due to better light uniformity and spectrum.
Pre-Installation: Assessing Your Current Greenhouse Lighting Infrastructure
A successful retrofit requires meticulous planning. Purchasing wholesale plant grow lights without first auditing your facility’s infrastructure is a recipe for blown budgets and electrical hazards.
Electrical Capacity and Load Analysis
The first step is auditing your main electrical service and sub-panels. You must calculate the total available amperage. Because LED fixtures draw significantly fewer amps than their HPS counterparts, an upgrade often frees up substantial space on your electrical panel. For example, on a 240V circuit, a 1000W HPS fixture might draw over 4.5 amps. A highly efficient 600W LED will draw only 2.5 amps.
This means that if your existing breaker panel was maxed out with HPS lights, switching to LEDs might allow you to increase the total number of fixtures—and thus the light intensity in your greenhouse—without having to pay for an expensive facility electrical service upgrade. Always consult with a licensed electrician to perform a formal load calculation in accordance with local electrical codes (such as the NEC Article 547 for agricultural buildings in the US).
Light Mapping and PPFD Requirements
Do not fall into the trap of a 1-to-1 replacement strategy. Replacing a 1000W HPS fixture directly with a 1000W LED fixture will likely result in light burn, as the photon output (efficacy) of modern LEDs is drastically higher.
Instead, focus on PPFD optimization (Photosynthetic Photon Flux Density). You must know the target PPFD (measured in µmol/m²/s) required for your specific crop at the canopy level. Professional lighting manufacturers use software like DIALux to create customized 3D light maps of your greenhouse. This simulation accounts for:
The dimensions of your facility.
The mounting height of the fixtures.
The natural Daily Light Integral (DLI) is provided by the sun (which varies by geographic location and season).
The specific beam angle and spread of the LED lenses.
Proper light mapping ensures perfect uniformity across the canopy, eliminating dark spots and hot spots, which leads to uniform plant growth and easier canopy management.
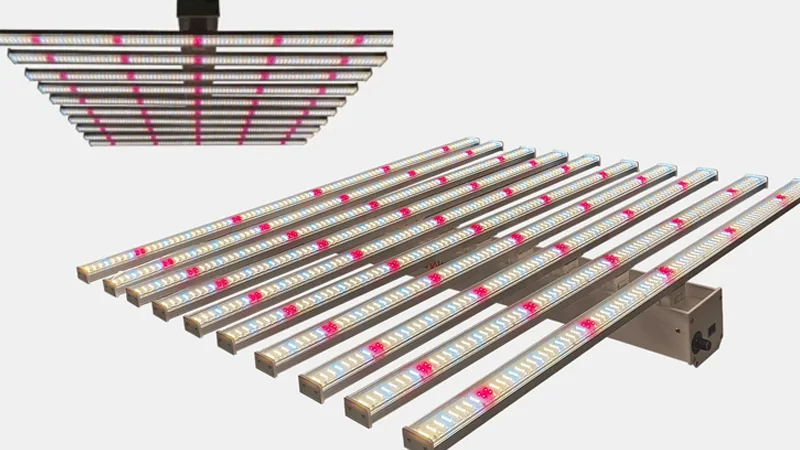
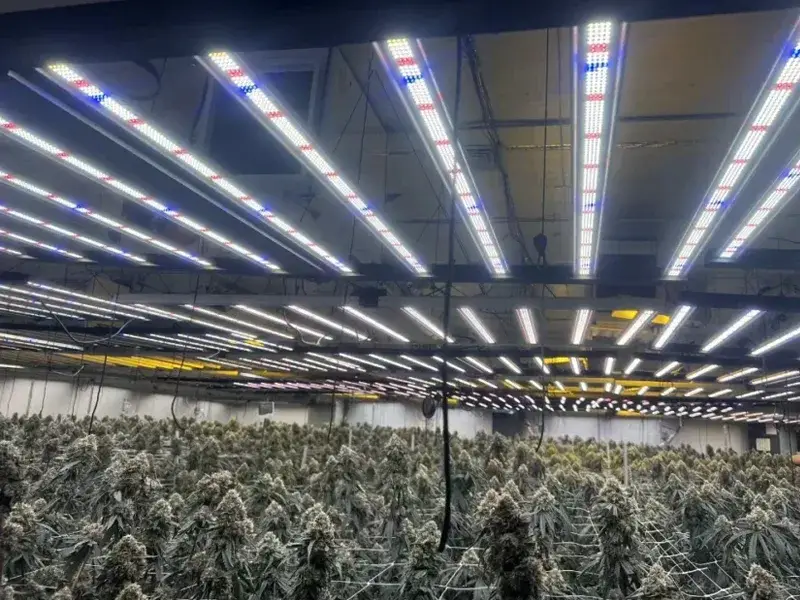
Selecting the Right Commercial LED Grow Lights
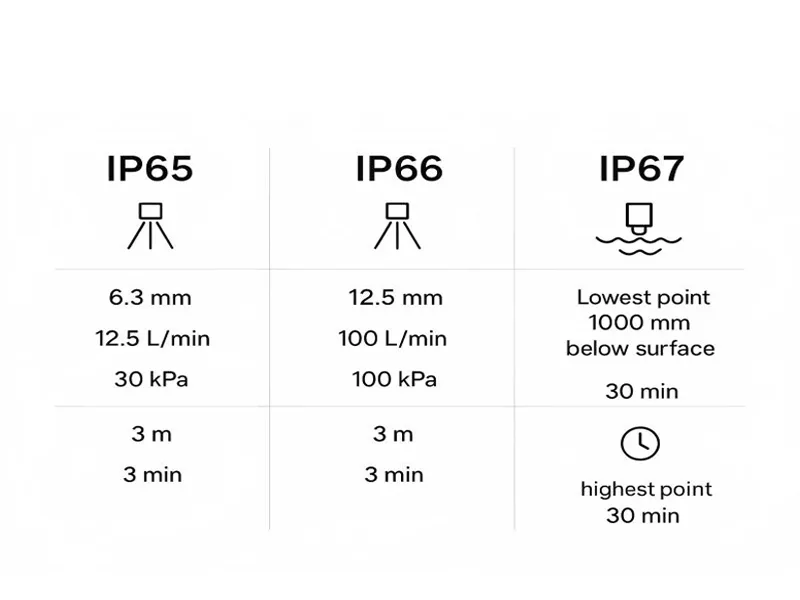
Greenhouses are harsh environments. High humidity, temperature fluctuations, dust, and regular chemical spraying demand rugged equipment. When selecting a partner, look for a proven SLTMAKS grow light manufacturer that provides fixtures with high IP ratings (IP65 or IP66) to ensure they are fully waterproof and dustproof.
Furthermore, consider the form factor. In a greenhouse, natural sunlight is your cheapest resource. Choose slim, linear LED bar designs that cast a minimal shadow footprint, preventing sunlight blockage during the day, unlike bulky HPS reflectors.
Wiring and Electrical Considerations for HPS to LED Retrofits
The physical electrical transition requires deep technical knowledge. Modern LED drivers behave differently from traditional magnetic or electronic HPS ballasts.
Voltage Compatibility
Commercial greenhouses operate on various voltages to maximize electrical efficiency. Common configurations include 120V, 240V, 277V, and 347V/480V for massive industrial facilities. Higher voltages are preferred because they reduce the amperage draw, allowing you to run more fixtures on a single circuit and use thinner, less expensive copper wiring. When upgrading, ensure your new LED fixtures feature auto-sensing drivers that can adapt to your specific voltage range (e.g., a driver rated for 100-277V or 277-480V).
Daisy-Chaining and Power Cord Management
To minimize installation labor and reduce the clutter of cables blocking natural light, utilize fixtures that support daisy-chaining. This allows you to connect multiple LED fixtures end-to-end, pulling power from a single electrical receptacle.
Safety Warning: You must calculate the maximum number of fixtures that can be daisy-chained safely. This is determined by dividing the maximum amperage of the circuit breaker (safely de-rated to 80% for continuous loads) by the amperage draw of a single fixture. Exceeding this limit poses a severe fire risk.
Use UV-resistant, industrial-grade power cords (like SJTW or SOOW cables) that can withstand prolonged exposure to the greenhouse environment.
Inrush Current and Breaker Sizing
One of the most common and frustrating issues during an LED retrofit is overlooking “Inrush Current.” While LEDs draw less power while running, their internal drivers require a massive, instantaneous spike in current (lasting just milliseconds) to charge the internal capacitors when first turned on. If dozens of LEDs are connected to a standard circuit breaker and turned on simultaneously, this combined inrush current will cause the breaker to trip immediately, even if the running load is well within safe limits.
The Solution:
Upgrade to Type C or Type D curve circuit breakers, which are designed to tolerate brief, high-current surges without tripping.
Implement staggered lighting controllers or contactors that turn on banks of lights in sequential delays (e.g., 5 seconds apart) to distribute the inrush load.
Compliance and Safety Standards
Ensure every component of your new system is compliant with local safety standards. Look for certifications such as UL8800 (the specific safety standard for horticultural lighting equipment), CE, and RoHS. Not only is this vital for the safety of your workers and facility, but non-certified equipment is generally disqualified from lucrative utility rebate programs.
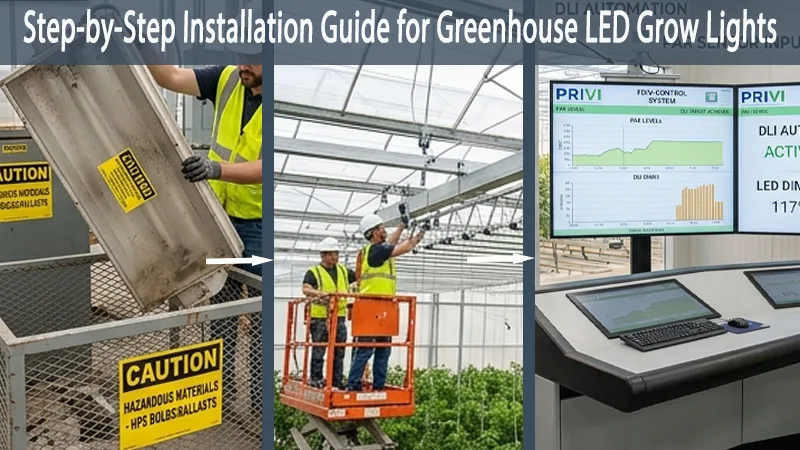
Step-by-Step Installation Guide for Greenhouse LED Grow Lights
With the planning and electrical auditing complete, the physical installation can commence. Proper execution minimizes downtime and protects your investment.
Phase 1: Safely Decommissioning HPS Fixtures
LOTO Procedures: Implement strict Lockout/Tagout (LOTO) protocols at the main breaker panel to ensure no power is flowing to the lighting circuits during removal.
Safe Removal: Carefully lower the heavy HPS fixtures. HPS bulbs contain hazardous materials, including mercury and sodium. They must not be thrown in standard dumpsters.
Environmental Disposal: Partner with a certified hazardous waste disposal company to recycle the bulbs and the electronic/magnetic ballasts in compliance with local environmental regulations.
Phase 2: Mounting Strategies for Greenhouses
LED fixtures, particularly large multi-bar arrays, can be heavier or differently shaped than compact HPS hoods.
Truss and Unistrut Systems: For rigid and scalable mounting, utilize Unistrut (c-channel) suspended from the greenhouse trusses. This allows for horizontal sliding and adjustment.
Wire Rope/Aircraft Cable: Use stainless steel aircraft cables with adjustable heavy-duty carabiners or ratchet hangers.
Mounting Height: LEDs do not project intense radiant heat, meaning they can generally be mounted much closer to the plant canopy than HPS lights without causing heat stress. However, mounting them too close will reduce the light spread and cause poor uniformity. Refer strictly to the manufacturer’s recommended mounting height based on your specific light map.
Phase 3: Integrating Smart Control Systems
A major advantage of LED technology is its deep integration with automated control systems. Most high-end commercial LEDs feature 0-10V dimming capabilities.
Dimming Wiring: Run low-voltage (usually 18 AWG) control wires from the LED drivers to your central controller. Ensure you do not run low-voltage control wires parallel to high-voltage power lines to avoid Electromagnetic Interference (EMI), which can cause the lights to flicker.
Controller Integration: Connect the lighting arrays to greenhouse environmental computers (like Priva, Argus, or TrolMaster).
DLI Automation: Program the system to utilize a photosynthetically active radiation (PAR) sensor mounted outside or inside the greenhouse. The system will read the natural sunlight coming in and automatically dim the LED lights up or down to hit your precise Daily Light Integral (DLI) target, ensuring zero wasted electricity.
Troubleshooting Common Post-Installation Issues
Even with flawless planning, the transition from HPS to LED introduces new variables to your growing environment. Here is how to troubleshoot the most common technical and agronomic challenges.
Issue 1: Lights Flickering or Flashing
If your new LED arrays are flickering, the issue rarely lies within the light-emitting diodes themselves.
Check the Dimming Circuit: The most common culprit is EMI interfering with the 0-10V dimming signal. Ensure control wires are shielded.
Voltage Drops: If daisy-chaining too many fixtures over a long distance, a voltage drop can occur at the end of the line, causing the final fixtures to flicker.
Loose Connections: The high-humidity environment can cause minor corrosion. Double-check all waterproof twist-lock connectors and NEMA plugs.
Issue 2: Breakers Tripping at Startup
As discussed in the wiring section, if your breakers trip the moment the lighting timer clicks on, you are experiencing inrush current overload.
Action: Do not just flip the breaker back on repeatedly, as this damages the contacts. You must either swap to a C/D curve breaker or program a sequential startup delay in your lighting controller.
Issue 3: Plant Response and Environmental Adjustments (CRITICAL)
This is the most overlooked “troubleshooting” aspect of an HPS to LED retrofit. Growers frequently report that after installing LEDs, their plants grow slowly, exhibit calcium or magnesium deficiencies, or look generally unhappy. The lights are not broken; your environment is out of balance.
When you remove HPS lights, you remove thousands of BTUs of infrared radiant heat. Under HPS, the Leaf Surface Temperature (LST) is often 2°C to 4°C higher than the ambient room temperature. Under LEDs, the LST is usually equal to or slightly lower than the ambient temperature.
Because the leaves are cooler under LEDs, the plant’s transpiration rate (how it “sweats” and pulls water and nutrients up from the roots) slows down dramatically.
The Fix – Manage VPD: To maintain a healthy Vapor Pressure Deficit (VPD) and encourage transpiration, you must raise the ambient temperature of your greenhouse (often by 3°C to 5°C) when switching to LEDs.
The Fix – Irrigation & Nutrients: Because plants transpire less, they drink less water. You must adjust your irrigation dry-back strategies. Overwatering is incredibly common right after an LED retrofit. Furthermore, you may need to adjust your fertigation recipe to ensure mobile nutrients like Calcium are being efficiently transported through the cooler plant tissues.
Why Partner with SLTMAKS for Your Greenhouse Lighting Solutions?
Navigating the complexities of a commercial retrofit requires more than just an equipment vendor; it requires a strategic engineering partner. As a premier SLTMAKS grow light manufacturer, we specialize in engineering robust, high-yield wholesale plant grow lights tailored specifically for the rigors of commercial greenhouse environments.
When you partner with SLTMAKS, you are investing in comprehensive greenhouse lighting solutions. We don’t just ship boxes. Our team of lighting engineers and agronomists provides end-to-end support, including:
Free, customized DIALux light mapping to guarantee flawless PPFD optimization for your specific crop and facility dimensions.
Consultative electrical infrastructure reviews to ensure your drivers, voltages, and dimming protocols are perfectly matched.
Industry-leading warranties and rugged, IP-rated hardware designed to outlast the harshest humidity and chemical exposures.
OEM/ODM customization capabilities for massive commercial rollouts requiring specific spectra or form factors.
Whether you are retrofitting a half-acre tomato greenhouse or building a multi-hectare medicinal canopy, SLTMAKS delivers the photon engine that drives your profitability.
Conclusion
Upgrading your legacy systems to advanced LED technology is the most impactful operational decision a modern commercial grower can make. While the intricacies of electrical load balancing, inrush currents, and VPD adjustments require careful navigation, the resulting HVAC savings, extreme energy efficiency, and superior crop yields make the HPS to LED retrofit undeniably worthwhile.
Don’t let outdated lighting hold back your facility’s potential. Contact SLTMAKS today to speak with our engineering team, request a free facility lighting audit, and take the first step toward a more profitable, sustainable, and high-yielding greenhouse. Visit us at https://www.sltmaks.com/ to explore our commercial catalog.
FAQ
How many LED grow lights do I need to replace my 1000W HPS fixtures?
You should avoid a strict one-to-one replacement. While a 600W-700W commercial LED can often replace the photon output of a 1000W HPS, the exact number depends on your target PPFD (Photosynthetic Photon Flux Density) and light uniformity requirements. It is highly recommended to use professional light mapping software (like DIALux) to simulate the layout in your specific greenhouse rather than guessing the replacement ratio.
Why are my plants growing more slowly after switching from HPS to LED?
This is a very common issue caused by environmental imbalances, not the lights themselves. HPS fixtures emit high amounts of infrared heat, warming the Leaf Surface Temperature (LST). LEDs emit very little radiant heat, resulting in cooler plants and a slower transpiration rate. To fix this, you must adjust your Vapor Pressure Deficit (VPD) by raising your greenhouse’s ambient room temperature by 3°C to 5°C and reducing your irrigation frequency.
Why do my circuit breakers trip when I turn on my new LED grow lights?
This is usually caused by “inrush current.” Even though LED grow lights draw fewer amps while running compared to HPS, their internal drivers require a massive, millisecond-long spike in electricity to charge their capacitors at startup. If too many lights turn on simultaneously, this surge trips standard breakers. You can resolve this by upgrading to Type C or Type D curve breakers or using a controller to stagger the startup times.
Do LED grow lights actually reduce greenhouse cooling costs?
Yes, drastically. Traditional HPS lights produce thousands of BTUs of forward-radiating infrared heat that bakes the plant canopy, forcing HVAC systems to run constantly. Because commercial LED greenhouse lighting dissipates heat convectively through rear heat sinks rather than radiating it downward, your facility’s cooling load is significantly reduced, leading to major operational savings.
Can I use my existing electrical wiring when upgrading to LED greenhouse lighting?
In many cases, yes. Because LED fixtures draw significantly less amperage than HPS fixtures, your existing electrical panels and wiring can usually handle the load easily. In fact, the lower amperage draw often allows you to safely add more light fixtures to your existing circuits. However, you must always have a licensed electrician verify your voltage compatibility, total amperage load, and ensure your setup meets safety standards like UL8800.